
Deck hatch maintenance
Don’t let a little drip turn into a gusher; fixing hatches isn’t as hard as you think
The time will come when you need to give your deck hatches some attention. Those little drips when it rains or when you have a deck washer passage are your first clues. A little drip now and again isn't a big deal, but a sustained leak can be a mess and cause damage in time. A hatch that won't close securely can be a safety hazard.
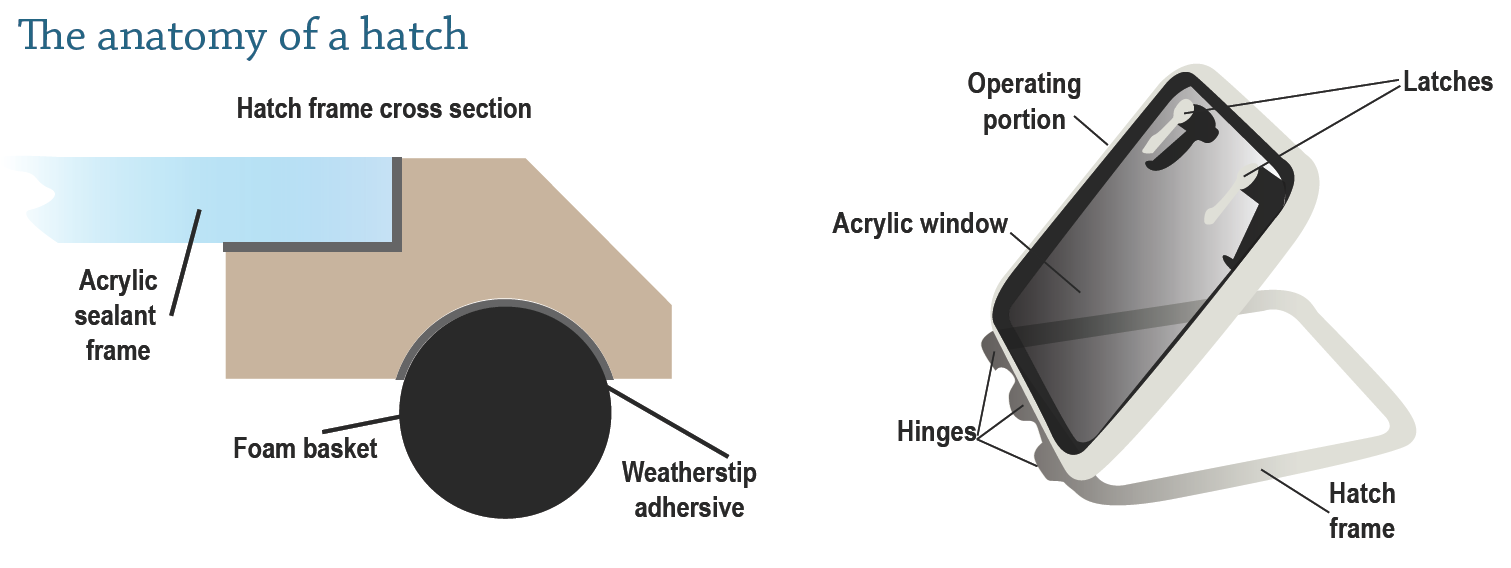
Deck hatches can leak between the acrylic window and the frame, between the operating portion of the hatch and the frame or between the frame and the deck. Test the hatch with a hose and go below to assess the leak. I am embarrassed to admit that I have skipped this step and repaired a leak that didn't exist while the actual leak just persisted.
Acrylic rebedding
If the hatch leaks between the window and the frame, completely remove the acrylic, clean and rebed. You may want to assess the condition of your acrylic when you are rebedding. If the plastic is in poor condition you can easily have a plastic shop cut a new blank. It should cost less than $200 for a good-sized hatch.
Start by removing the window with a razor knife and putty scraper. Just cut all around the window and pop it out. Next, remove all of the old adhesive residue from the acrylic and frame. There is no easy way to do this and it is important to not shortcut this portion. Just keep scraping and then wipe it down with solvent at the end. A light sanding with 80-grit takes care of the last dregs of adhesive.
Once you have everything clean you'll need to glue the window back in. I like to use Dow Corning 795, which is a tough silicone product used specifically for attaching glazing to frames. Start by taping off the acrylic and the frame with blue masking tape, which will make it much easier to clean up later. Next, lay a generous bead of the sealant into the frame, lightly lay the window in and fill the gap between the acrylic and the frame. Press the sealant down with a plastic scraper, resisting the urge to work it too much or to use your fingertip because you'll only make it look worse. I like to remove the tape while everything is still wet. If you leave any sealant residue you can clean up with solvent such as 3M Adhesive Remover.
Comments