Installing a steering wheel
Swapping out a wheel is a quick job that may require a little ingenuity
Sometimes a new steering wheel is called for. Changing to a wheel that’s a slightly different size than the existing wheel, or a different design, such as a foldable wheel that allows easy access through the cockpit, or replacing one that is damaged or misshapen are all good reasons to swap out a wheel. And sometimes you just want something different.
Since steering systems vary widely, installing a new steering wheel may be a simple job or require a little bit of ingenuity. For a recent project in which we replaced an aging and less-than-perfectly-round Edson steering wheel with a beefier-but-lighter Carbonautica wheel, the project landed somewhere in between.
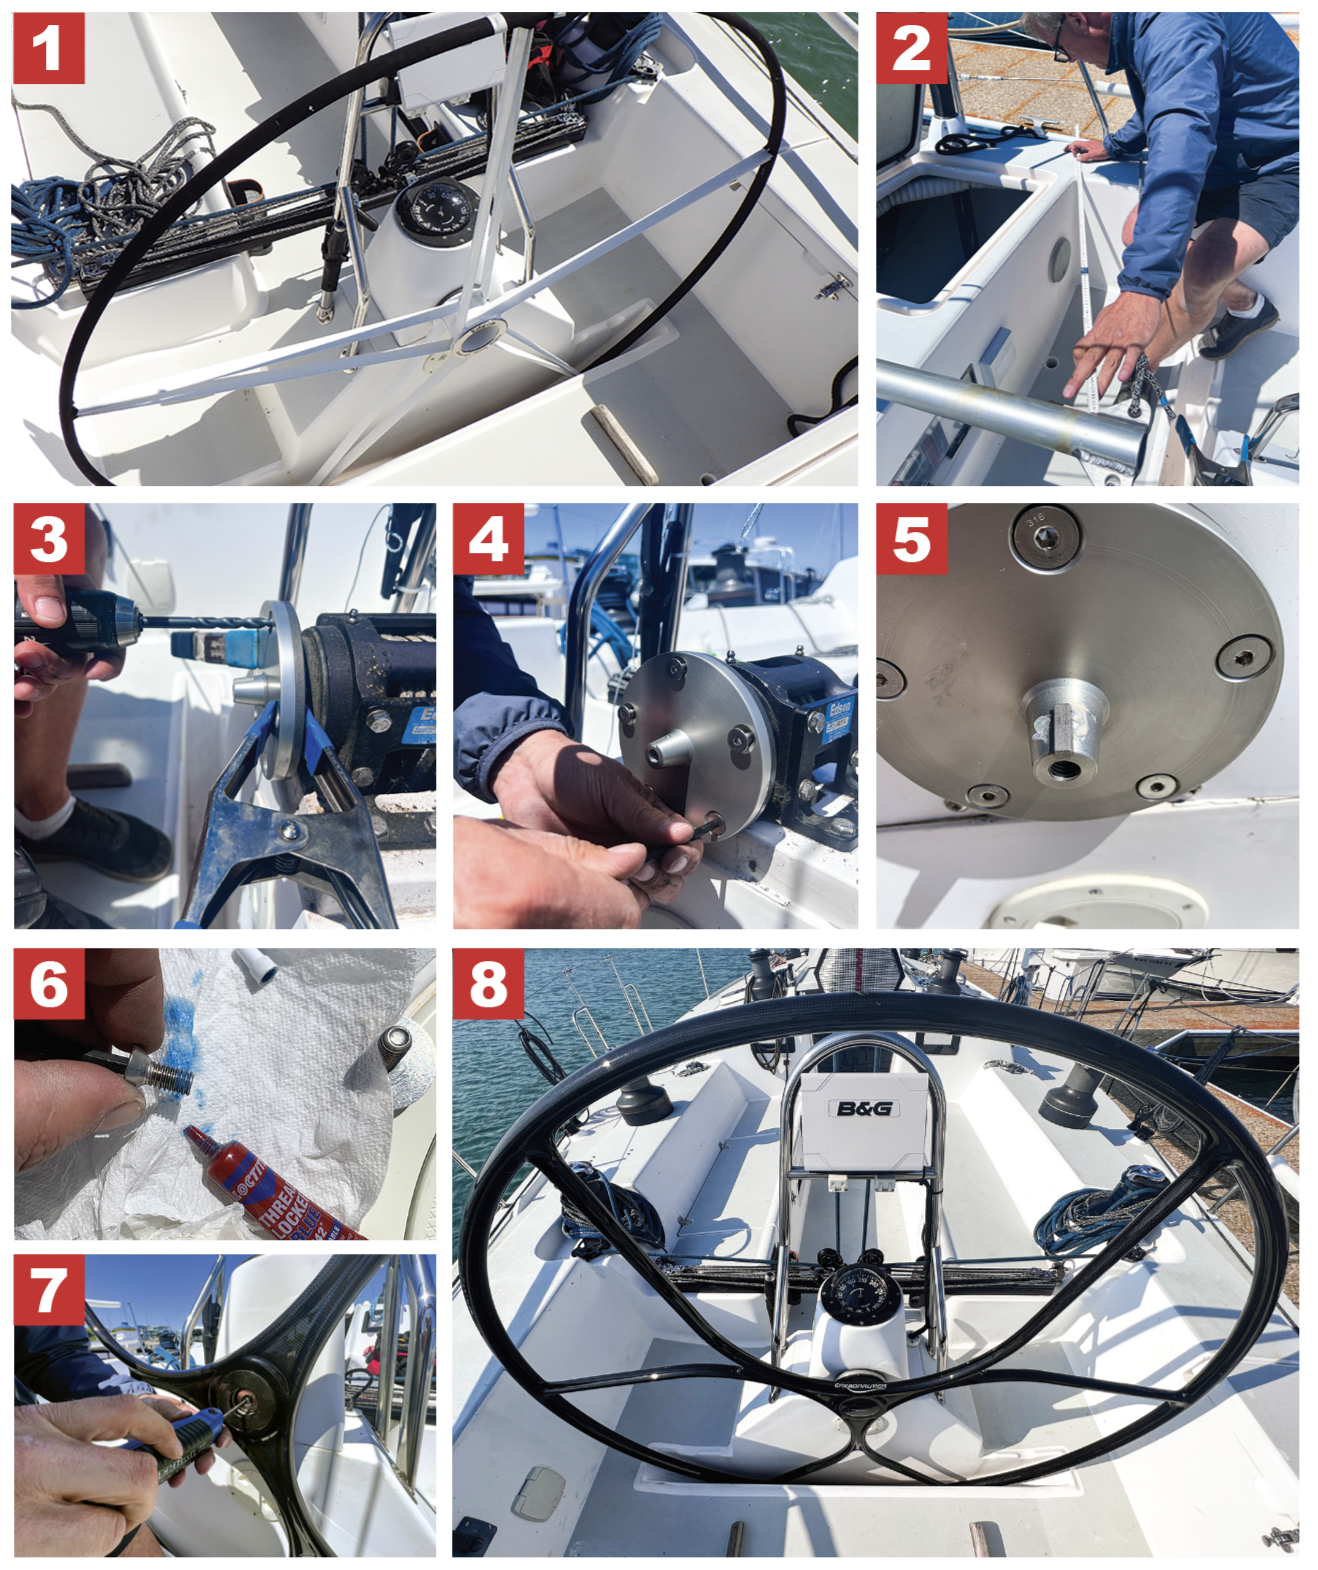
The original 22-year-old wheel was mounted directly to the steering hub, but that wouldn’t work with the design of the new wheel, which required a spindle attachment. A custom aluminum adapter plate was a little off, but was an easy fix by drilling new bolt holes in the hub. But before any of that could be done, the rudder had to be pegged on center.
The easiest way to make sure the rudder was centered and the wheel, therefore, would be mounted in a centered position, was to mount the emergency tiller and measure from the tiller to the same point on the rail on either side. The centered tiller was then tied off while the adapter plate was mounted.
Using a plumb bob mounted on the center of the binnacle, we were able to line up the key slot in the spindle, then clamp the plate onto the hub. Making sure the plate was perfectly aligned with the hub—any deviance would put the 1600-millimeter-diameter wheel out of alignment—we drilled new bolt holes through the hub to match the adapter plate. We followed up with a tap to create threads.
With the holes drilled, the adapter plate was attached to the hub with countersunk stainless steel screws.
After a test fit, we applied lubricating grease on the spindle to prevent corrosion, a step the wheel manufacturer recommended we repeat annually.
The key, a standard 5-millimeter stainless piece, needed a small amount of refinement to slide easily into the keyway in the wheel and then onto the spindle, without being too loose. A few passes with a sanding disk on a Dremel tool did the job. Lining up the key slot with the adapter plate, the wheel slid on with no problem.
A single bolt holds the wheel onto the spindle, and a bit of blue Loctite was used at the end of the bolt before securing it.
With that, the stealthy new wheel was installed, and ready for action.

1. With more than two decades of hard service, the original steering wheel was misshapen and in need of replacement. 2. Centering the rudder is key to making sure the new wheel is mounted properly. The emergency tiller was mounted and tied on center by measuring from the tiller to the same point on the rail on both sides. 3. New holes had to be drilled in the hub to fit a custom adapter plate, which was clamped on the hub. 4. Stainless steel screws were used to mount the adapter plate onto the hub. 5. Lubricating silicone grease was applied to the spindle before mounting the wheel, a step that should be repeated annually. 6. Blue Loctite was used on the center bolt. 7. With the wheel mounted, the center bolt secures it in place. 8. The new wheel is ready for its first sail.

Comments