
Repairing delaminated core
Catch wet, delaminated core early and the fix is not difficult
It’s not unusual for boats, particularly those of a certain age, to have some areas of wet core and delamination. This is often found near deck hardware, often because of poor mounting and bedding practices, or around the chainplates, an area that is constantly under load and therefore more prone to leaks. Diagnosing
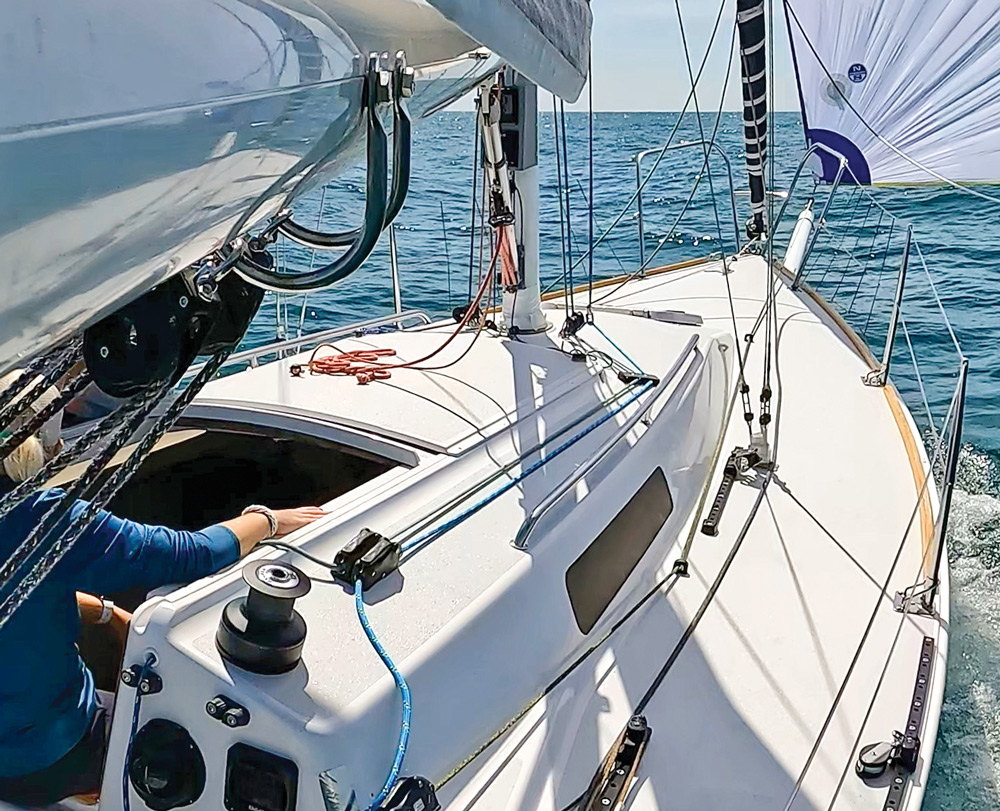
a leak, wet core and delamination and repairing the area is important, but is not that big of a job if you can catch it early.
Diagnosing the problem
Finding a leak usually starts with paying attention to what water is doing when it rains, waves wash over the deck or you’re washing the boat. If you notice water on mounting hardware or water pooling under a fitting you know its leaking. Also check backing plates and mounting hardware down below and look for signs of rust or staining.
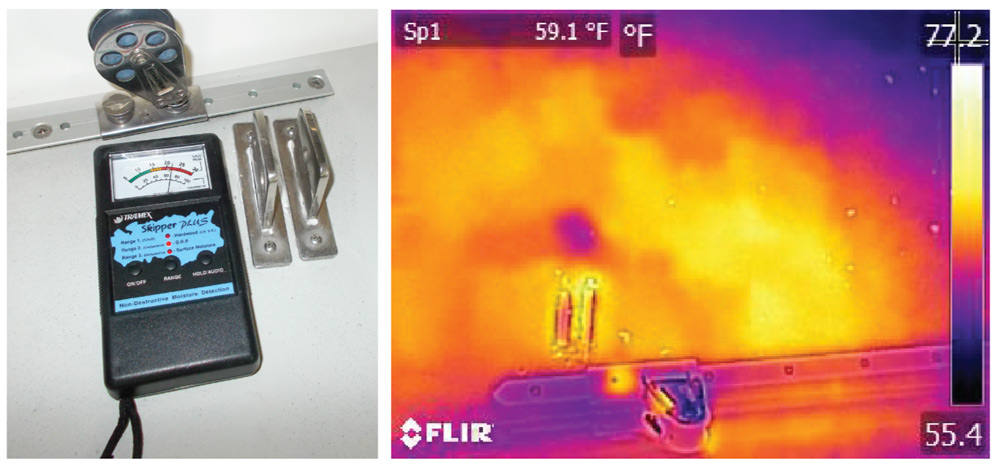
Determining if the core is wet requires a bit more work. Start with non-destructive testing methods, such as moisture conductive meters or infrared thermal photography, which can help give a good idea of what might be happening in the deck. These methods are not foolproof, but combined with visual signs, they offer a pretty good indication that you may have a wet core problem.
If wet core is suspected, the next step is to determine if there is delamination, when the fiber-reinforced plastic skins separate from the core material, often due to the core material rotting. The simplest way to diagnose delamination is by tapping on the suspected area with a phenolic hammer. A solid laminate will return a solid crisp sound and a laminate that has separated from the core will have a “dead” sound, similar to hitting a cardboard box.
Start the repair
Once delamination is diagnosed, digging in—literally— is the best way to determine the severity of the problem. Start by removing all fittings around the area that will be examined and repaired. After the parts are removed, inspect them carefully for any corrosion. Crevice corrosion happens on all fittings where there is a lack of oxygen such as the area where the fittings go through the deck. Most, if not all, chainplate failures are due to crevice corrosion where the chainplate goes through the deck.
The next step is to open the deck. The easiest way to do this is by using a vibrating saw such a Dremel Multi-Max or similar tool. The goal is to cut through the outer laminate to be able to peel off the outer skin exposing the core material. Start small by removing as small an area as possible and expand out until you find good, dry core material. Once you have the outer skin off you can get a better assessment of the type, condition and thickness of the core.
Once the outer skin is off and the core is exposed, you can determine the extent of the damaged core material. Using a chisel, painter’s tool, screwdriver or other tools, remove all wet and damaged core. Take your time, and work carefully so as to not damage the inner skin, which you’ll be bonding the new core material to. Clean up the repair area, cutting clean edges into dry core to make it easy to fit in the replacement core.
After the core is removed, the next step is to prepare the area for new core and create a scarf joint on the existing deck surrounding the repair. The size of the tapered joint will depend on the number of layers of composite laminate. If possible, get a laminate schedule showing the weight of fiberglass, orientation of the fibers, number of layers and the type of resin used from the boatbuilder. This will ensure the repair is consistent with the original construction method. If that’s not possible, count the lamination layers as you sand the edges of the repair area to make the scarf joint. The joint should be a width that is approximately a half-inch to three-quarters inch wide per layer of laminate. The more structural the repair is, the wider the joint should be to insure a good bond. With a joint width determined, sand out the tapered area the appropriate distance.
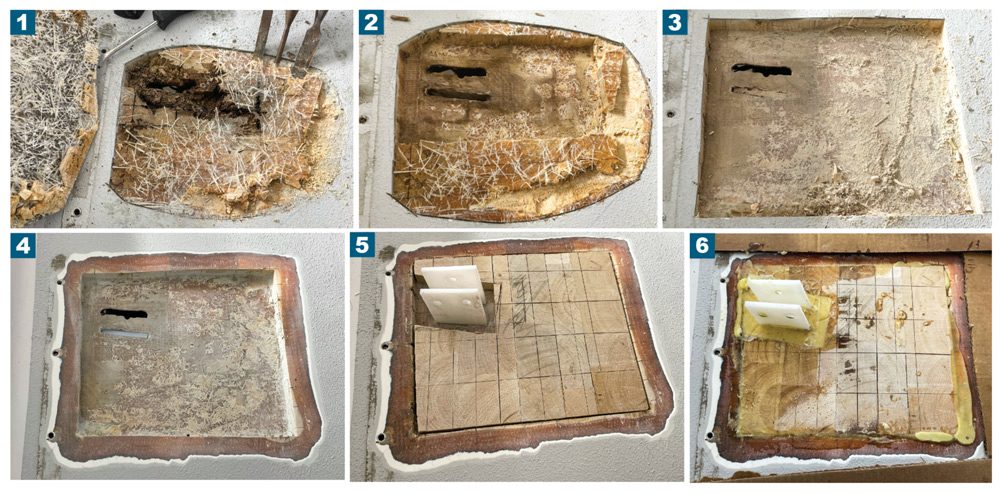
Put it back together
After you have the area cleaned up and scarf joint sanded, you can then start putting it back together. It can be helpful to make simple templates of the chainplates out of plastic to fit the repair properly around them. Measure, cut and dry fit the new core to the repair area to fill as much of the area as possible, leaving the area directly around the chainplates without core, so that this area is fully filled with resin.
When you are satisfied that the new core material fits well, it’s time to bond in the core. There are many types of resins that you can use, with epoxy being the most common and universally acceptable on any repair. If you use any other kind of resin like a vinylester or polyester, it must be compatible with the original resin used when the boat was built or it will not bond properly.
Before placing the new core into the repair area, wet out the existing core and the replacement core with straight resin so that it soaks in. Then apply thickened resin—it should be a mayonnaise-like consistency— to the repair area on the inner skin and existing core. After all the resin is applied, set the new core in place and work it into position so that it is at the same level as the existing core. Excess resin will squeeze out so be prepared to scrape that away. The area around the chainplates where the core was left out is now backfilled with thickened resin. This step prevents any water intrusion into the core should the chainplates develop a leak in the future.
Glass it in
After the resin cures—about six to eight hours, although the time will vary depending on the kind of resin and environment—it’s time to prep the area for the glass work. Remove the chainplate templates and sand off any excess resin to create as flat a surface as possible. A trick to make fitting the glass layers easier is to create templates with plastic sheeting, such as Visqueen or plastic painter’s drop cloth. Put a sheet of plastic over the repair area and trace the outline of the repair area with a permanent marker. Then repeat the process with additional layers of plastic—one for each layer of glass you’ll lay down—making each succeeding layer slightly smaller than the first. This process creates the scarf taper on the new glass.
There are many kinds of glass matting available and if you don’t have the lamination schedule from the boatbuilder, you can choose matting that will provide good strength in multiple directions. For example in a repair such as this you might alternate three or four layers of plain weave and bidirectional weave matting.
On the plastic with the outline drawn on it, wet out a layer of glass with straight resin. You want the glass to become translucent in color which indicates that the glass is fully saturated. Repeat this for each layer. This step is best done on a table or other flat surface that is off the boat as it can be quite messy. Cover each piece with another sheet of plastic and then with a squeegee, squeeze out all excess resin working from the middle outward. Then you can cut each individual piece with a scissors around the traced outlines.
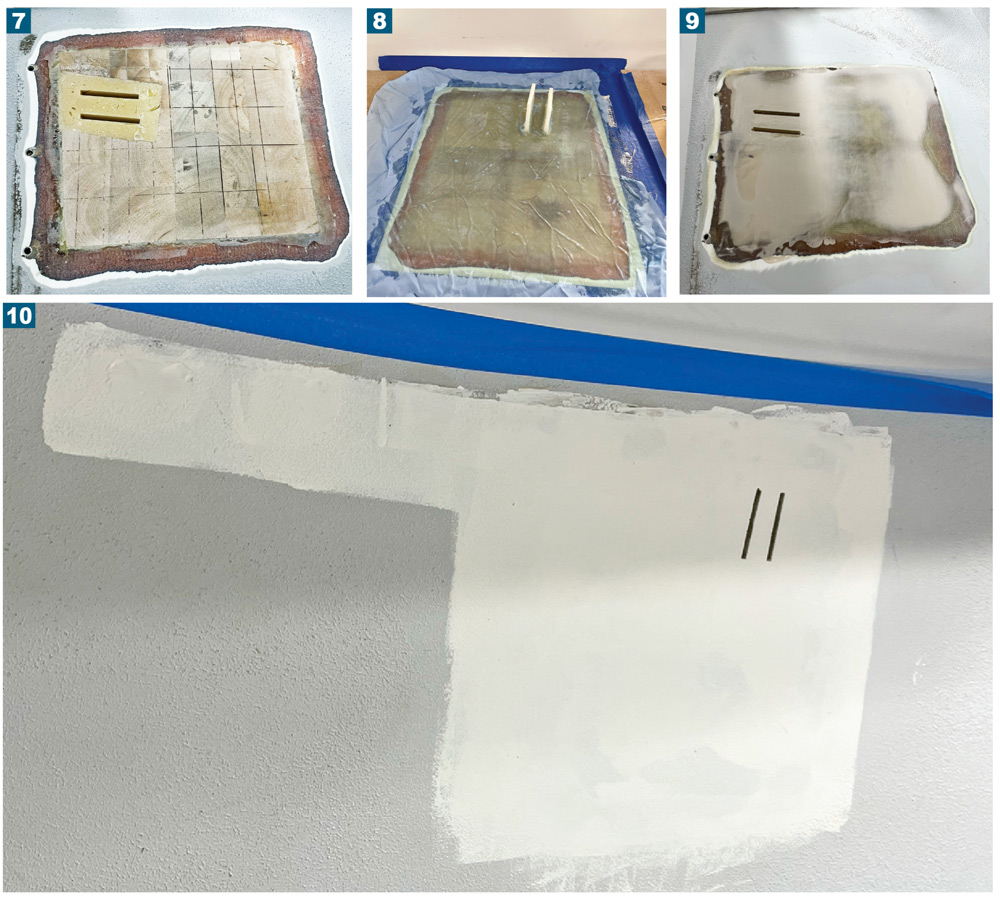
At this point, you will have multiple layers of wetted out glass. Put the chainplate templates back into position to help position the glass. Then place each piece of glass on the repair area starting with the largest one first. Remove the plastic from the glass and place into position. This step can be a little tricky so patience is needed to get all layers correctly orientated. After you have all layers of glass in place, cover the area with peel ply and, with your squeegee, smooth out the area. The peel ply should become translucent just like the glass did. Allow the repair area to cure.
The final steps are fairing and painting. Use a fairing compound or thickened epoxy with fairing compound mixed in to apply thin, flat layers. Allow each layer to dry and then sand, adding layers as necessary to create a flat, seamless transition to the existing deck so that the repair area is neither sunken nor proud of the rest of the deck. Once it’s fair to your desire, sand and clean the area and follow with primer and paint to match the existing deck.
Comments