
Installing alternate power sources
Solar, wind can power a boat at anchor with system that take up less space than ever
There is no greater pleasure than anchoring your boat and lingering as long you like. At face value this seems like a simple proposition, but our lives have gotten a little complicated. A crew at anchor will want to run the fridge, music, lights and more, and this all takes electricity. Thankfully, technology has advanced to where these systems can run indefinitely given ample sun and wind. Your time at anchor is only limited by water tankage and the beer in your fridge.
I recently helped a couple set up their Whitby 42 for long-term cruising with a self-sustaining electrical system. The boat was already optimized for efficient energy consumption with an efficient refrigerator, LED lighting and more. But the goal of self-sustaining electrical required solar panels, a wind generator and a system to monitor it all.
One of the first jobs was to segregate the house loads to the house bank and the engine load to the start bank, both the positive and negative side. Isolating the negative side isn’t usually required, but the owners wanted a battery monitoring system, which requires that all the negatives of the loads flow through the monitor’s shunt. I added a few bus bars in the engine room to connect all the loads together.
The boat was originally equipped with a diode-based battery combiner, which works well but can drop almost a volt in the process. Losing this volt of charging power makes charging that much slower. I replaced the combiner with a Blue Seas Automatic Charging Relay or ACR. The ACR connects the banks together if it sees a charging voltage of roughly 14 volts on either side of the relay. The banks are paralleled when a charging voltage is present and isolated when there is not.
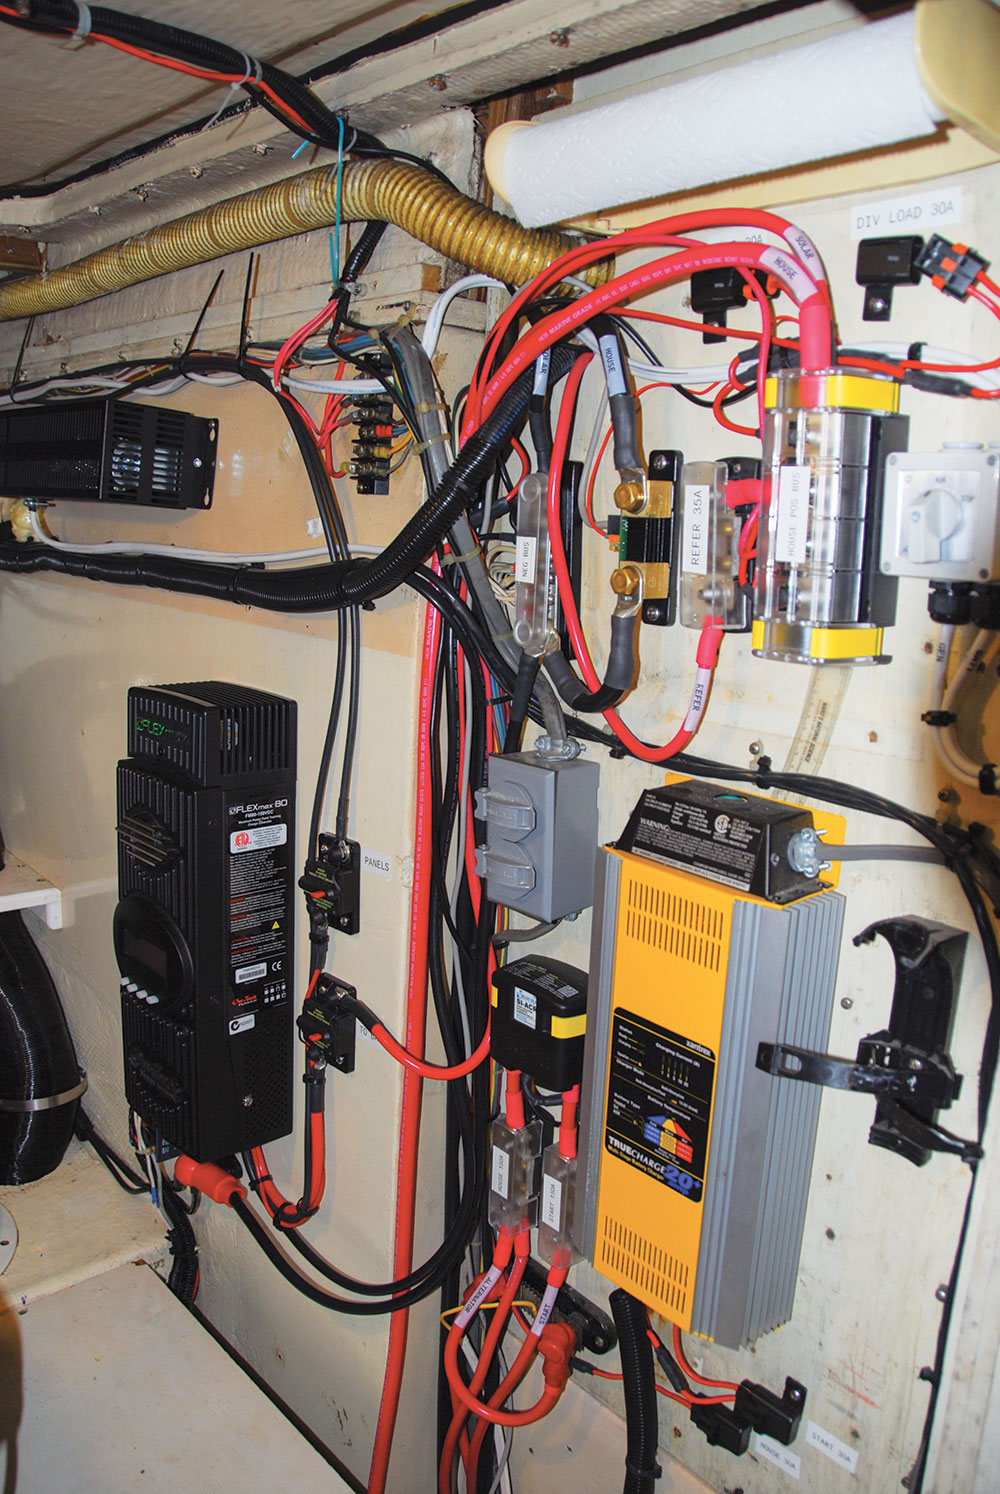
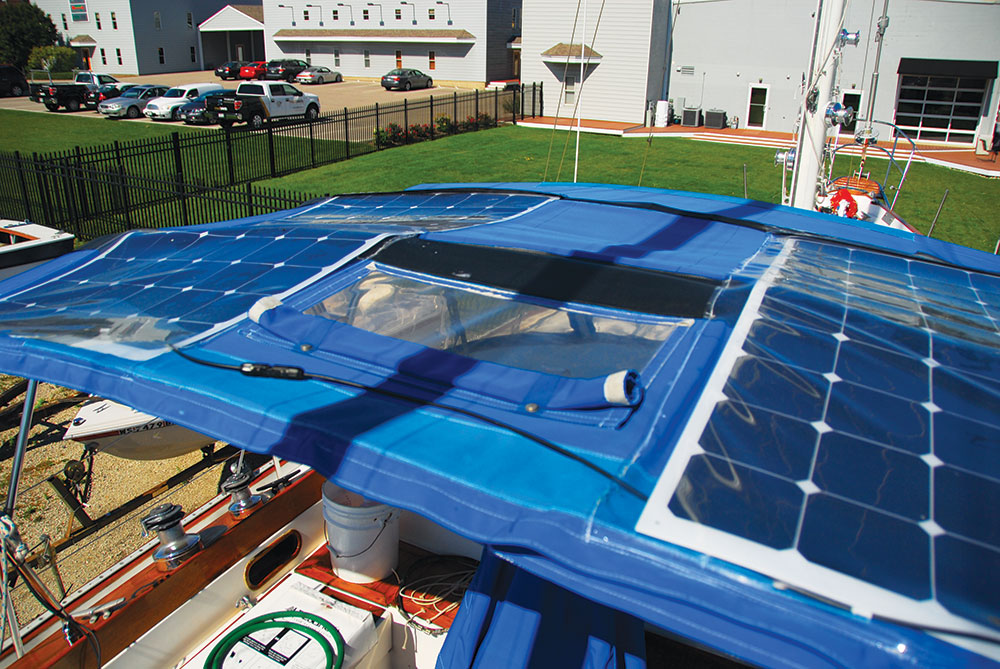
With a solid battery and switch gear system we turned our attention to alternative charging sources—solar and wind. We would install two solar panels on the bimini and a wind generator high on the mizzen mast. We installed two 180-watt panels built with Sunpower Maxeon cells, which are semi-flexible panels with very good efficiency. A canvas shop sewed pockets on the boat’s existing bimini to hold the panels, which feed into an Outback Flexmax FM80 charge controller mounted in the engine room.
We opted to connect the solar panels in a series configuration vs. parallel configuration. Although a parallel connection offers redundancy—if one panel fails, the rest keep working—and shadows have less of an effect on output, a series connection is more efficient. It will charge in less light and the higher voltage yields less system current so the voltage drop across the wiring is lower. As a side benefit, the cabling is a little cleaner too, as the panel cables just snap together and you take a cable from each panel back to the controller. Speaking of “snapping together” most solar panels these days use MC4 connectors, which are industry standard connectors that are both waterproof and very UV stable. I would recommend that you use, or fabricate, MC4 cables to connect to the controller.
I used MC4 cables to connect the panels to the controller, and per the controller instructions, 2-gauge wire from the controller to the house bank. I used a Blue Seas circuit breaker in both the connection to the panels and from the controller to the house bank. It is critical to install a circuit breaker or some other form of disconnect in the positive connection between the panels and controller so that you can disconnect the panels to work on them. In theory you could just open one of the MC4 connectors, but this is a high-power DC connection with sufficient current and the nonquenching DC arc will destroy the connectors in time.
We mounted a Leading Edge 300 wind turbine mounted on a custom bracket on the mizzen mast. The wind turbine is externally regulated with a diversion load controller. To regulate battery charging and to stop the turbine from over powering in high winds the controller dumps excess power to a large wire wound resistor. To prevent the generator from spinning uncontrollably fast in high winds, the unit uses a run/stop switch which shorts the output of the generator. In winds up to about 20 knots the stop function actually stops the blades, and between 20 and 40 knots the function allows the blades to jog along. At more than 40 knots of wind, it is recommended that the generator be lashed perpendicular to the wind.

We finished off the system with a Victron Energy BMP800 battery monitor system. This system consists of a negative connected shunt and a small display connected with a cable that looks a lot like a network cable. The system will act as a “fuel gauge,” showing the level of charge left in the battery bank as well as the instantaneous current flow. Of course, the other parameters of battery voltage, current and battery temperature are also available.
The owner also wanted more granular performance data on the solar and wind system. One of the reasons we chose the Outback controller was the built-in diagnostics, logging and display. The controller will use the instantaneous input/output operating parameters and totals them each day. We don’t have direct telemetry on the wind generator but have discussed adding a system in the future. For now the owner measures the system voltage and current with a clamp-on meter.
It’s time to setup your boat and get out there. With a little work, you won’t be the boat that needs to break the solitude by running your engine to charge.
Comments