Ready to sail
Finding issues before they become big problems should be at the top of every boat’s fitting out list
Check the chainplates and shrouds

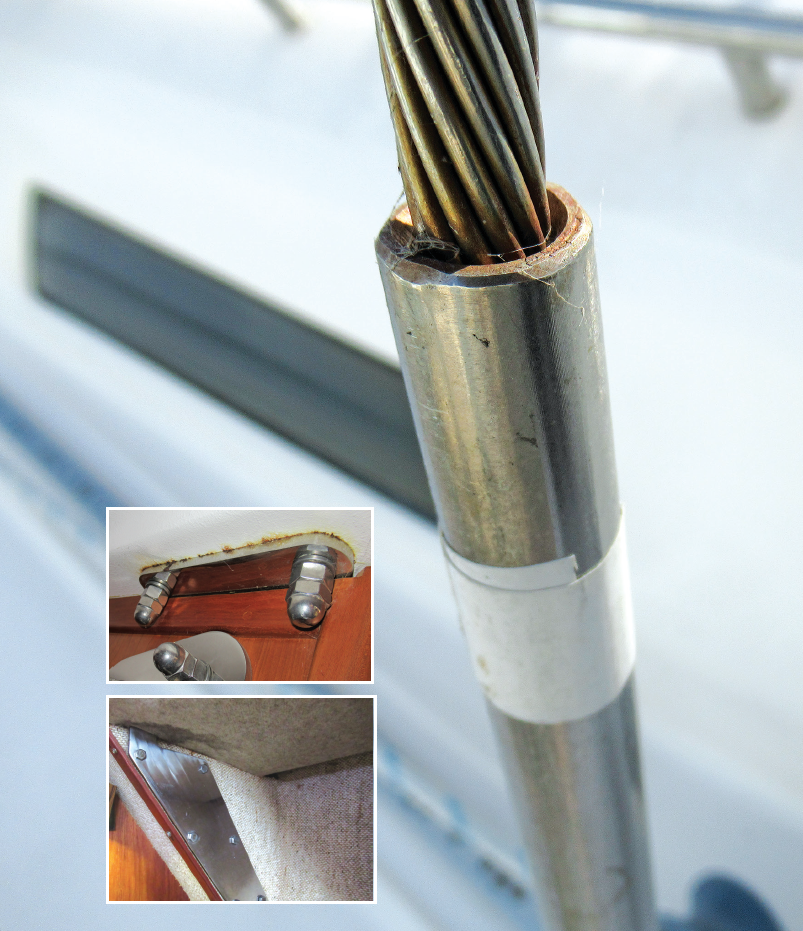
Every sailor knows that the chainplates are at the top of the list of structural items that have to be in good shape. They are a key piece that can lead to rig failures, so it’s worth keeping a close eye on.
Sometimes chainplate issues are obvious when viewed from on deck. Cracks and rust are easy to spot. But chainplate failures are often caused by water intrusion underneath them, and that’s something that often shows up down below before it’s obvious on deck.
A thorough inspection can start on deck, stepping or tapping on the deck around the chainplates, looking for signs of softness or movement.
Belowdecks you should look for water staining around the chainplates or rust around the fittings. Both are signs that water has leaked through. Don’t be fooled by shiny stainless fittings if they are surrounded by water staining.

If any water intrusion is found, any wet core or compromised material will have to be removed and replaced, ensuring that the chainplates are solidly mounted.
While you’re checking the chainplates on deck, make sure that the shrouds are properly pinned and taped.
Examine swage fittings and look for rust intrusion and cracks in the swage, a sure sign that it’s been compromised and likely in need of replacement.
Find the leak
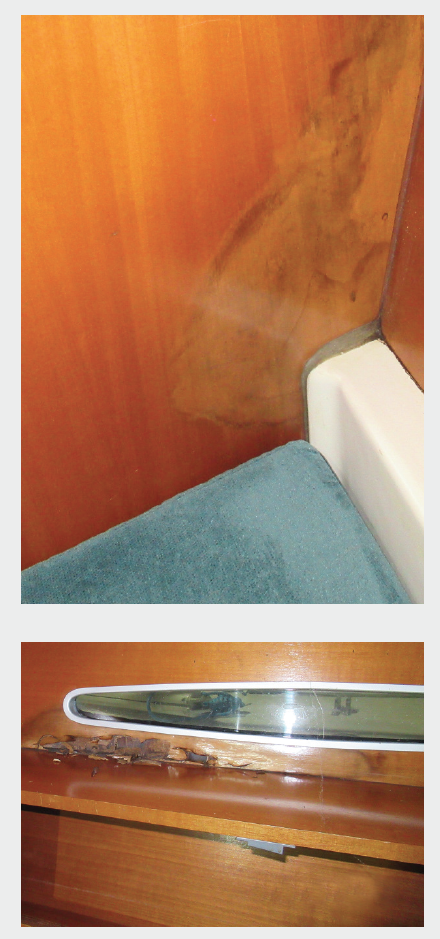
Owning a boat is an exercise in keeping the water on the outside, and it’s not always successful. Water damage belowdecks is a sure sign that something, somewhere is leaking.
It’s worth hunting down the source of even small leaks as they may cause more harm if left to languish.
The method of fixing a leak depends on its source. In the case of the obvious leak in the bottom photo, the portlight is likely to blame. In many cases leaks can be traced to improperly bedded deck hardware, which can be rebedded properly after any repairs to wet decking are made.
Examine the keel
Don’t miss the opportunity of having the boat out of the water to examine what’s going on underneath it. It may involve a ladder, but a close examination of the keel is best done on the hard where you can see detail far better than if you need to dive under the boat when it’s in
the water.
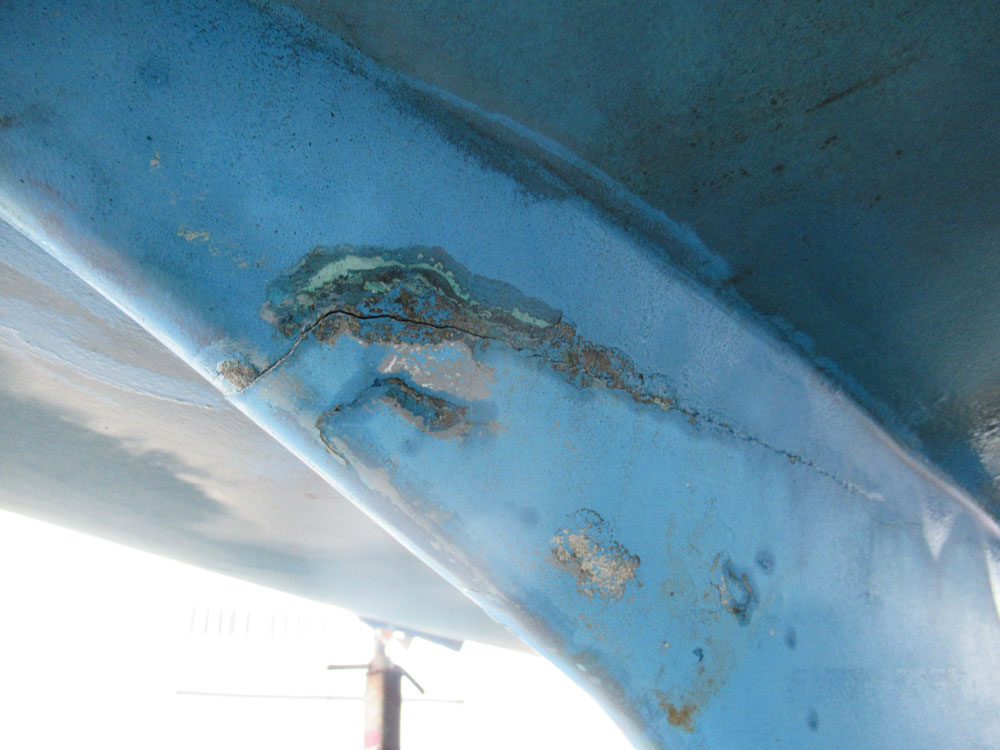
Pay close attention to the keel joint where it meets the hull. The bond between the hull and keel can separate over time and it’s not uncommon to find cracks on older boats from a grounding, stress or just repeated flexing.
Minor cracks should be noted and checked from time to time, but larger cracks, such as those shown here, are problematic. These can lead to water intrusion, which can corrode keel bolts. If a boat is stored in an area prone to freezing, the freeze-thaw cycle can contribute to the problem.

If you find large cracks, check the keel bolts and look for signs of leaking or corrosion. If there’s no sign that the keel bolts have leaked, you can address the cracks by grinding out the bad material, wrapping with fiberglass tape and faring over the top.
Signs of leaking through the keel bolts is another story. Since the corrosion is happening where you can’t see it, there’s no way to know how serious the issue is, and of course, it’s not something to guess on as corroded keel bolts are prone to breaking which can be catastrophic.
In this case you probably want to work with the boatyard to drop the keel and do a thorough clean up on the joint, replace the keel bolts and then rebed the keel. The job is not as scary as it sounds and will likely solve the joint issue for many years to come.

Comments