
Offshore sail repair
Arm yourself with a proper sail repair kit and a bit of knowledge to keep a passage intact when your sails aren't
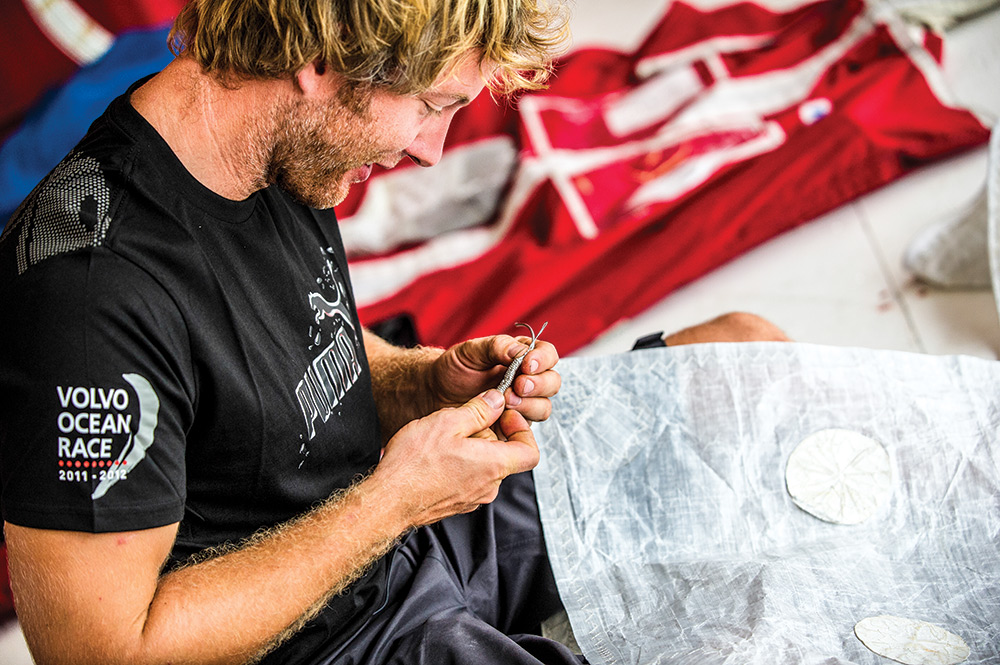
We wrestled the mainsail down and took stock of our situation. The main no longer had a clew attachment and two batten pockets were torn. As it turned out, there were no proper sail repair supplies on board. We were eight hours out of Portsmouth, Virginia, and 24 hours from any port to the south. If we went ashore, we’d need to get the main to a sailmaker and wait at least a day for the repair. None of that sounded like fun, especially when we were already three days delayed and going ashore would likely eat up another two days.
Fortunately, we were sailing in the Carib 1500 rally and had some buddies to lean on. We got on the radio and rounded up some sail twine and needles and we found some webbing on the boat and got to work. We had the repair finished in just a few hours and hoisted the main without losing much time.
Sail repair is a crucial offshore skill, many times it can save a passage. It takes a little planning to build a kit and to study some basic skills, but it is manageable for anyone. At their heart, sails are fabric stitched together with thread with a bit of webbing and a little hardware. You can easily fix any of the fabric and webbing interfaces, but a hardware failure can be more difficult to manage.
The most important part of offshore sail repair is that you can go a long way to avoiding it altogether by having your sailmaker inspect and repair your sails before you leave the dock. Depending on how actively you sail, I recommend you have your sails inspected once a year. Your sailmaker will spread out the sail and take a look at the common wear points. Many sailmakers offer a sail cleaning service at the same time. This inspection is valuable, as sailmakers can fix small problems before they become larger, saving time and money.
There are ready-made sail repair kits available in chandleries and marine stores but these are often inadequate. You are usually better off building your own kit customized for your boat and sails. Some of the materials you’ll need are readily available, but others will need to be purchased from your sailmaker.
You’ll need a good supply of waxed sail twine. Sail twine comes in different sizes: V346 is a good one for hand sewing. You’ll use twine for sewing on webbing and stitching cloth and it’s great for whipping running rigging. In the marine industry, sail twine is commonly available on one pound spools, but that is much more than you’ll need. Your sailmaker can get small bobbin-sized spools, and you’ll want a handful of them.
You’ll need some basic tools for working with the thread. Needles are the most important, but just any old needle won’t do. Do yourself a favor and get William Smith sailmaker’s needles, they are a pleasure to work with. These things of beauty have been forged in Redditch England since 1835 and they are designed to easily go through sails without damaging the cloth.
Even good needles are difficult to push through multiple layers of cloth, so you’ll need a sailmaker’s palm. A palm essentially works like a sewing thimble and allows you to push large needles with the palm of your hand. The best palms are made by William Smith as well. They make palms of varying quality costing from about $20 to a bit more than $100. Any of them will work, but the more expensive ones are nicer to use.
Beyond needles and thread, you’ll need a couple other tools. When you sew through multiple layers of cloth and webbing it is handy to pre-punch the holes with a small sailmaker’s awl. The awl will leave a hole that you easily push the needle through. When doing a repair you often have to remove damaged stitching. This can be done with a scissors or a small knife, but a seam ripper works much more efficiently.
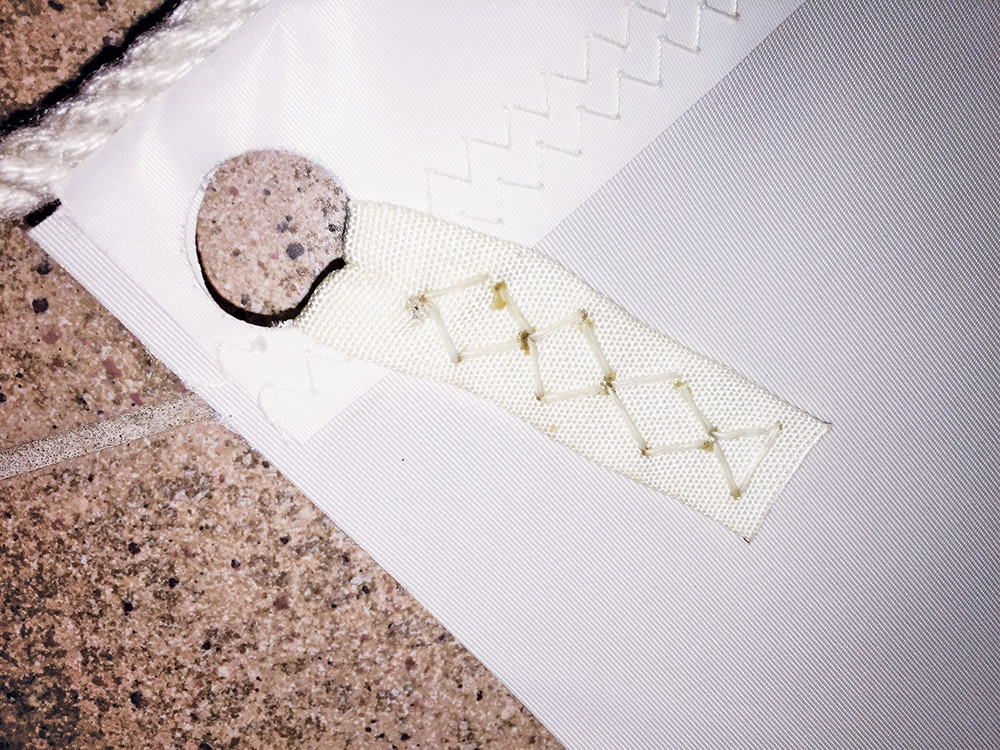
You will also need some repair materials—webbing and sail cloth. Dacron webbing often fails at the corners or other attachment points of the sail, so you’ll want spare webbing in each size used on your sails. I’d recommend a few yards of each. To repair torn cloth or reinforce a seam you’ll need sailcloth. You can get a few yards of Dacron cloth, but it is also convenient to use Dacron sailcloth tape. It is available in various widths from 2 to 6 inches. Even more convenient is sailcloth with an adhesive back, often called “sticky-back.” Sticky-back nylon tape is also available for repairing nylon spinnakers, and it is important to use the right tape on each type of sail.
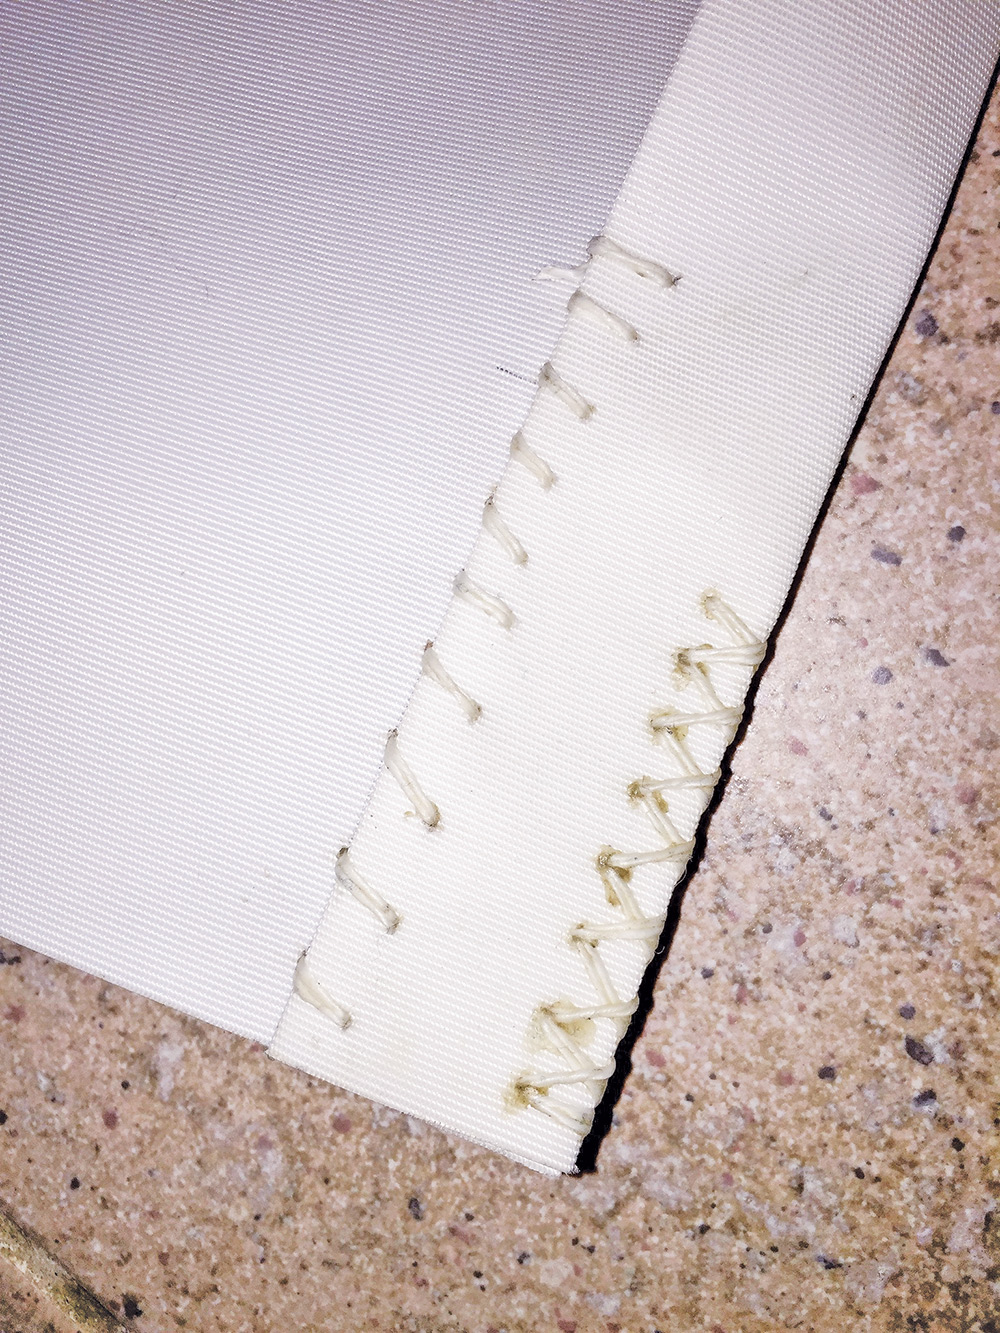
The most common problem you’re likely to run into is a webbing repair, either in a reinforcing role on a corner of the sail or to attach a mainsail slide. During our Carib 1500 passage, the webbing on the clew of the sail had parted, likely due to UV degradation. Webbing repairs are straightforward—you just replace the failed webbing with new. Since hand stitching isn’t always as strong as machine stitching, you should make the new webbing a little longer and possibly add more. Webbing is stitched in place with doubled waxed sail twine. You want to use an X-form stitch.
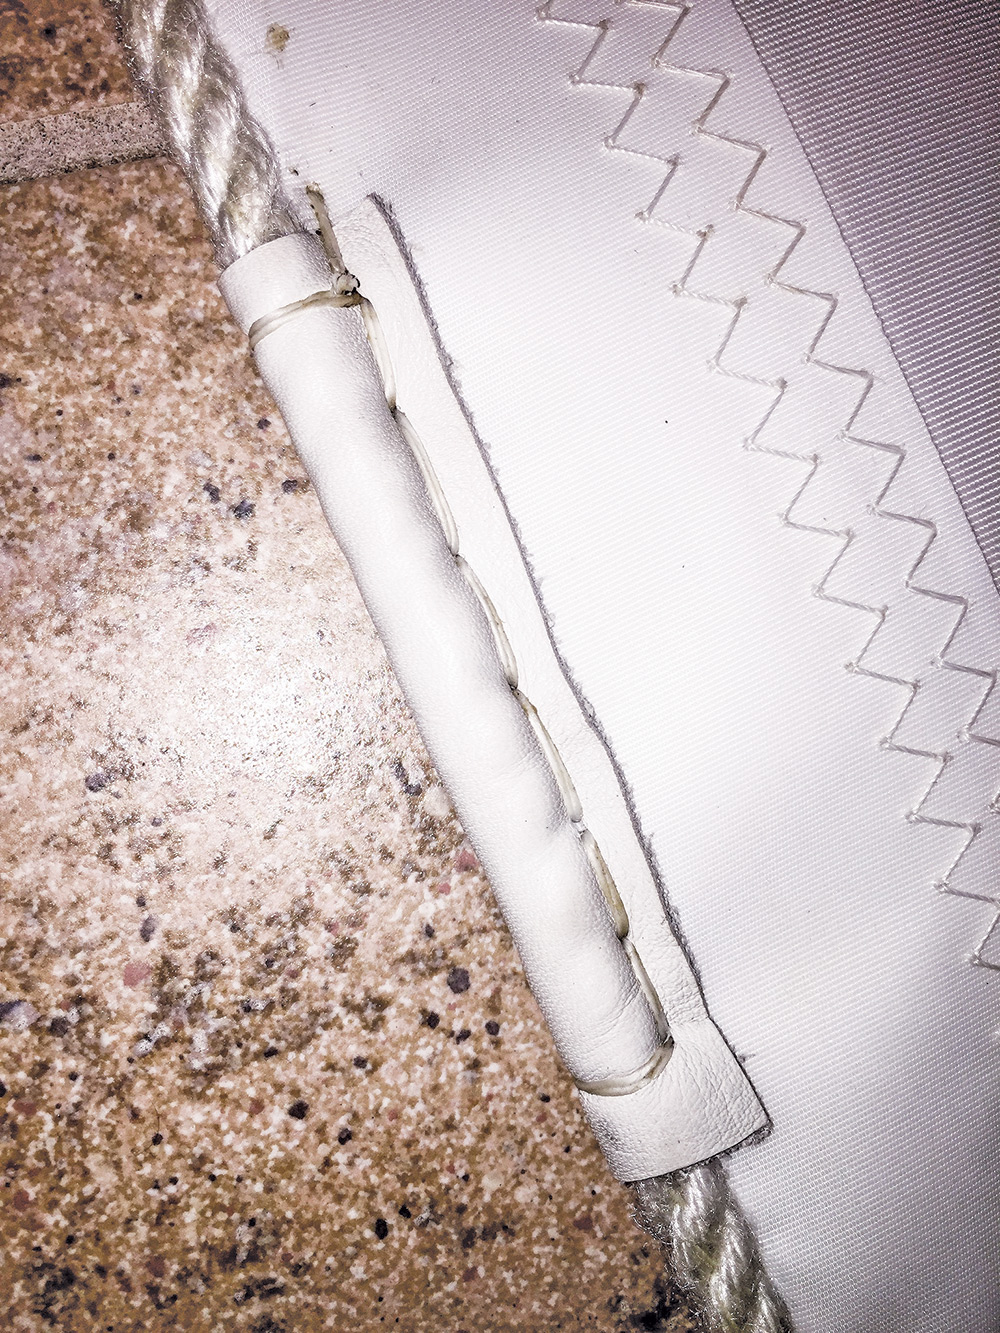
Chafe is the enemy of sails. Even with high-tech fabric, you can quickly wear through a sail. Sticky-back can be used to add reinforcing patches where sails rub against spreaders, radomes, shrouds and stanchions. If you find the edge of a sail is chafing, leather can be stitched over the worn area. The leather will need to be cut to size and pre-punched with the awl to be sewn in place.
Sticky-back is the easiest material to use in repairing a small tear. Make sure the sail is clean and dry, then cut a patch of sticky-back that is larger than the tear, and put it on. It is important to round the corners on the patch. A patch with square corners is easy to remove, but the rounded corners will adhere better and be less likely to catch on anything. For all but the smallest hole, you need to adhere a patch to both sides of the sail.
For larger tears, sticky-back can be layered, with the smallest layer right over the damage and larger pieces layered over. Sticky-back can be stitched in place on larger high-load repairs. Once the patch is in place on the front and back of the sail, stitch the perimeter of the patch with a diagonal stitch pattern. To keep the stitching neat you can lightly scribe a pencil line a quarter-inch inside the edge of the patch, making small hash marks to keep the stitches of equal size. Now, thread some sail twine onto a needle and follow the pencil line around the patch.
There is a new idea in sail repair, especially with laminate sails, where the sail is glued rather than sewn. Good old 3M 5200, in its Fast Cure form, is used to adhere a patch in place. This patch will be permanent and in most cases stronger than the sailcloth itself. 5200 is serious stuff, so you have one shot to get this repair right. Start by flattening out the damaged area and stabilizing the tear with package sealing tape from the back. The tape holds the damaged cloth in place and stops the 5200 from leaking through the repair. Similar to a sticky-back repair, you cut a piece of cloth a little larger than the damaged area and round the corners. Next, place the patch over the damage and sketch around it in pencil, this outline shows you where to spread the 5200. Now spread a thin layer of 5200 in the outlined area, and press the patch into the 5200 using a credit card or spreader to smooth out the patch onto the sail. The patch can be sealed over with a sticky-back Dacron patch cut a little larger than the 5200 patch. Once the 5200 cures, the sail can be turned over and patched in the same way on the other side.
Basic sail repair skills have the potential to save a passage and potentially more. Build a relationship with your sailmaker, have your sails inspected and have him build you a sail repair kit. With good prep, and a little luck, you may not need to use the repair kit, but if you do you’ll be ready.
Comments