
DIY canvas repair
Get the most life out of your canvas work with easy repairs you can do yourself
Canvas doesn’t last forever. UV rays, wind and regular wear take their toll on sail covers, biminis, dodgers and more. Replacement is an investment, but there’s a good chance your canvas work can make it a bit longer with a few repairs that you can do yourself.
Before you dive into any canvas repair, it’s a good idea to assess the condition of your canvas. If the item is old, worn and fraying in multiple spots, you may be better off replacing the canvas item instead of repairing the damaged areas. Sunbrella is probably the most common brand of performance acrylic fabric used for marine canvas, but if it’s more than 10 years old, it’s probably time to replace it, according to canvas specialists at Sailrite. But if the canvas is in otherwise good shape save for a tear, it’s a prime candidate for repair.
The quickest and potentially easiest way to sew a patch is by using a sewing machine. You can test if a home sewing machine is up to the task by sewing through four or five layers of denim. If it can manage that, it should be to handle a marine canvas repair.
Regardless of whether you use a home sewing machine or a speciality marine machine, use a UV bonded polyester thread to help protect against UV damage and a round point needle.
To create a canvas patch, cut out a rectangle around the rip in your canvas at least one inch larger than the hole on all sides. Cut a slit at each corner, fold the edges back (creating a hem to prevent unraveling) and sew in place. If you use a hot knife to cut the patch you will eliminate the need for hemming.
Cut a rectangle of your new patch material (top and bottom if necessary) larger than the hole in your old canvas. If you don’t have a hot knife, hem the edges of the patch fabric first, and then baste it in place on top of the rectangular hole in your cover. Sew around the perimeter of the patch to secure. If you’re adding a chafe patch from vinyl fabric you don’t need a hot knife; cut the patch with scissors as vinyl won’t fray.
No sewing machine? No problem.
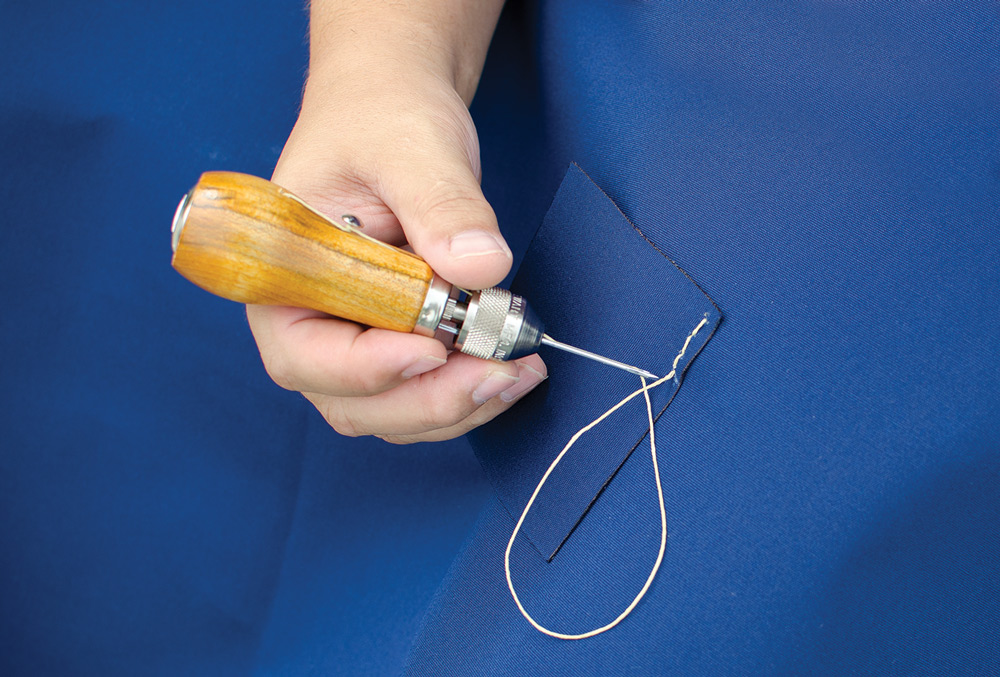
If you don’t have access to a sewing machine, there’s another option for adding a canvas patch to your bimini, cover, awning or whatever you’re fixing. A sewing awl such as a Speedy Stitcher manually produces lock stitches in the same manner that a machine will.
No-sew fixes also work for some repairs. Fabric patches and tape will stick to several kinds of surfaces. Check the label to make sure you get the right one for the fabric you’ll be repairing. These adhesive-backed patches and tapes create a solid, quick patch and will prevent the tear or hole from growing larger over time. An added convenience is that you might not have to take down your bimini or dodger for patching rips and tears.
Clean the fabric and let it dry completely before applying tapes or patches. Cut the patch one inch bigger on all sides and round off the corners. To apply, work slowly, peeling back the liner as you firm down the patch, making sure to avoid air bubbles. Match the patch on the back side of the tear if it is accessible. Rub the patch thoroughly to ensure good contact.
Fixing holes around snaps and grommets

A ripped-out snap fastener or grommet is not the end of the road for your boat cover or sail cover. There’s a simple way to fix the affected area and extend the life of your canvaswork. When a snap rips out, typically it’s because it wasn’t installed correctly in the first place. Check your snap fasteners and note if any are loose. If they can spin in the canvas, re-crimp the rivet to tighten and snug them down.
If your snap tears out completely, sew a small patch over the inside and outside of the cover over the tear like you would for any other tear. Once both patches are sewn you can install a new snap fastener.
If you have a rip caused by a grommet that pulled out you can repair the fabric and replace the grommet. If the failing grommet is still installed, cut out the grommet and torn fabric and repair the whole area. Installing a new grommet in fabric that is ripping is a waste of time and hardware.
Once the affected area has been cut away, you’ll need to recreate the original thickness of the fabric assembly so the new grommet can be installed correctly. Sew a patch that matches the size and thickness of the cut-away area. A good hold for a grommet is at least three layers of fabric. With the patch in place you can install a new grommet.
Restitching seams and zippers
Thread rots, weakens and breaks faster than your canvas will fail, so it’s not surprising that seams will break and unravel. You can often get several more years of use out of your canvas by restitching seams. A good way to test the strength of your thread is to pick at it with your fingers. If it falls apart or loosens very easily, you should restitch the canvas.
You don’t need to take the time to rip out the old thread, just sew right over it. This is faster, easier, and the existing thread provides a handy guide line for the new thread. Be careful not to get extra fabric caught under the sewing machine foot as you sew. If your stitches are in the middle of a very large amount of canvas, tightly roll your canvas bulk so it fits under the throat of the sewing machine.
Zippers will also rot over time with long exposure to the sun. A zipper at the end of its life will start to fall apart or frequently pop open on its own. If the zipper is easy to remove, rip out the seams holding it in place and sew in a new zipper. If the zipper is in a location where it’s surrounded by binding and other elements that would require a lot of deconstruction, simply cut out the failing zipper as close to the canvas as possible and install a new one.
Add chafe protection
To extend the life of your canvas and prevent future rips and weak spots, it’s a smart idea to add chafe protection to vulnerable areas on your canvaswork. This preventative measure keeps your dodger, bimini, sail cover and more functioning at peak performance and gives you much-needed peace of mind. Enjoy your time on the water without having to worry about potential issues with your canvaswork by adding chafe patches and reinforcement strips.
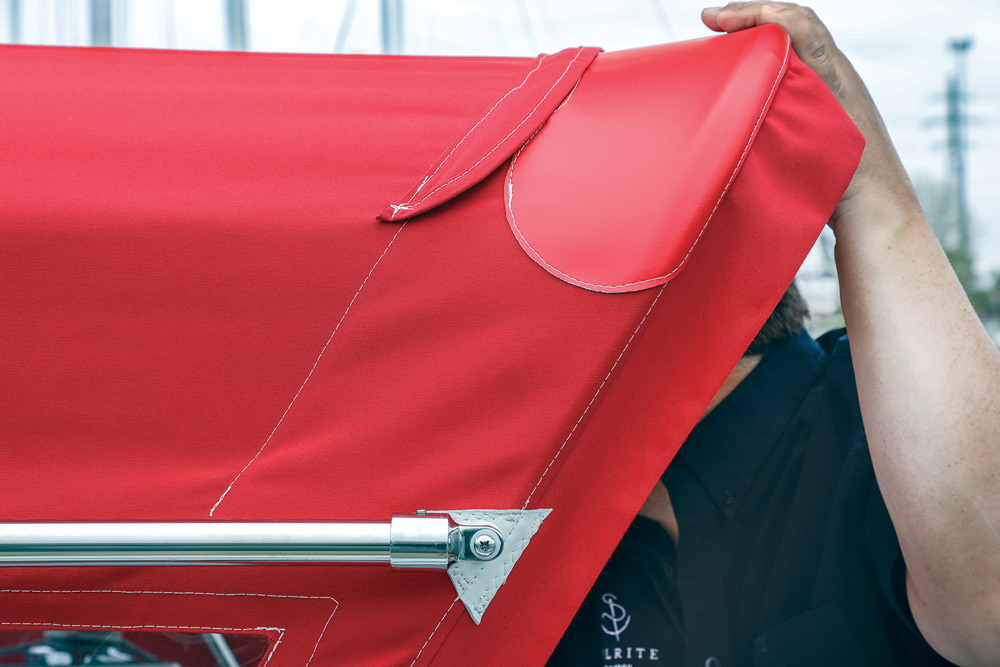
Anywhere your canvas item sees wear and stress is where you should add an extra layer of reinforcement. For example, the top aft edge of a dodger experiences its fair share of activity. The sail or gear can rub on the edge. It’s also a convenient grab rail for crew moving around the boat. Add a strip of durable vinyl, such as Naugahyde, as a chafe guard across the entire width of the aft bow. Since vinyl won’t fray, you won’t have to worry about hemming.
Other common chafe points include the top of a bimini or dodger, where the boom can rub, and any covers near cleats, winches or any hard, sharp object on your boat. You will want to add a patch of sailmaker’s leather or Shelter-Rite to all of these high abrasion areas to prevent future damage to your canvas.
Comments