
Splicing Dyneema
2023 December 1
Embrace the splice because knots aren’t best on the extremely strong fiber Dyneema
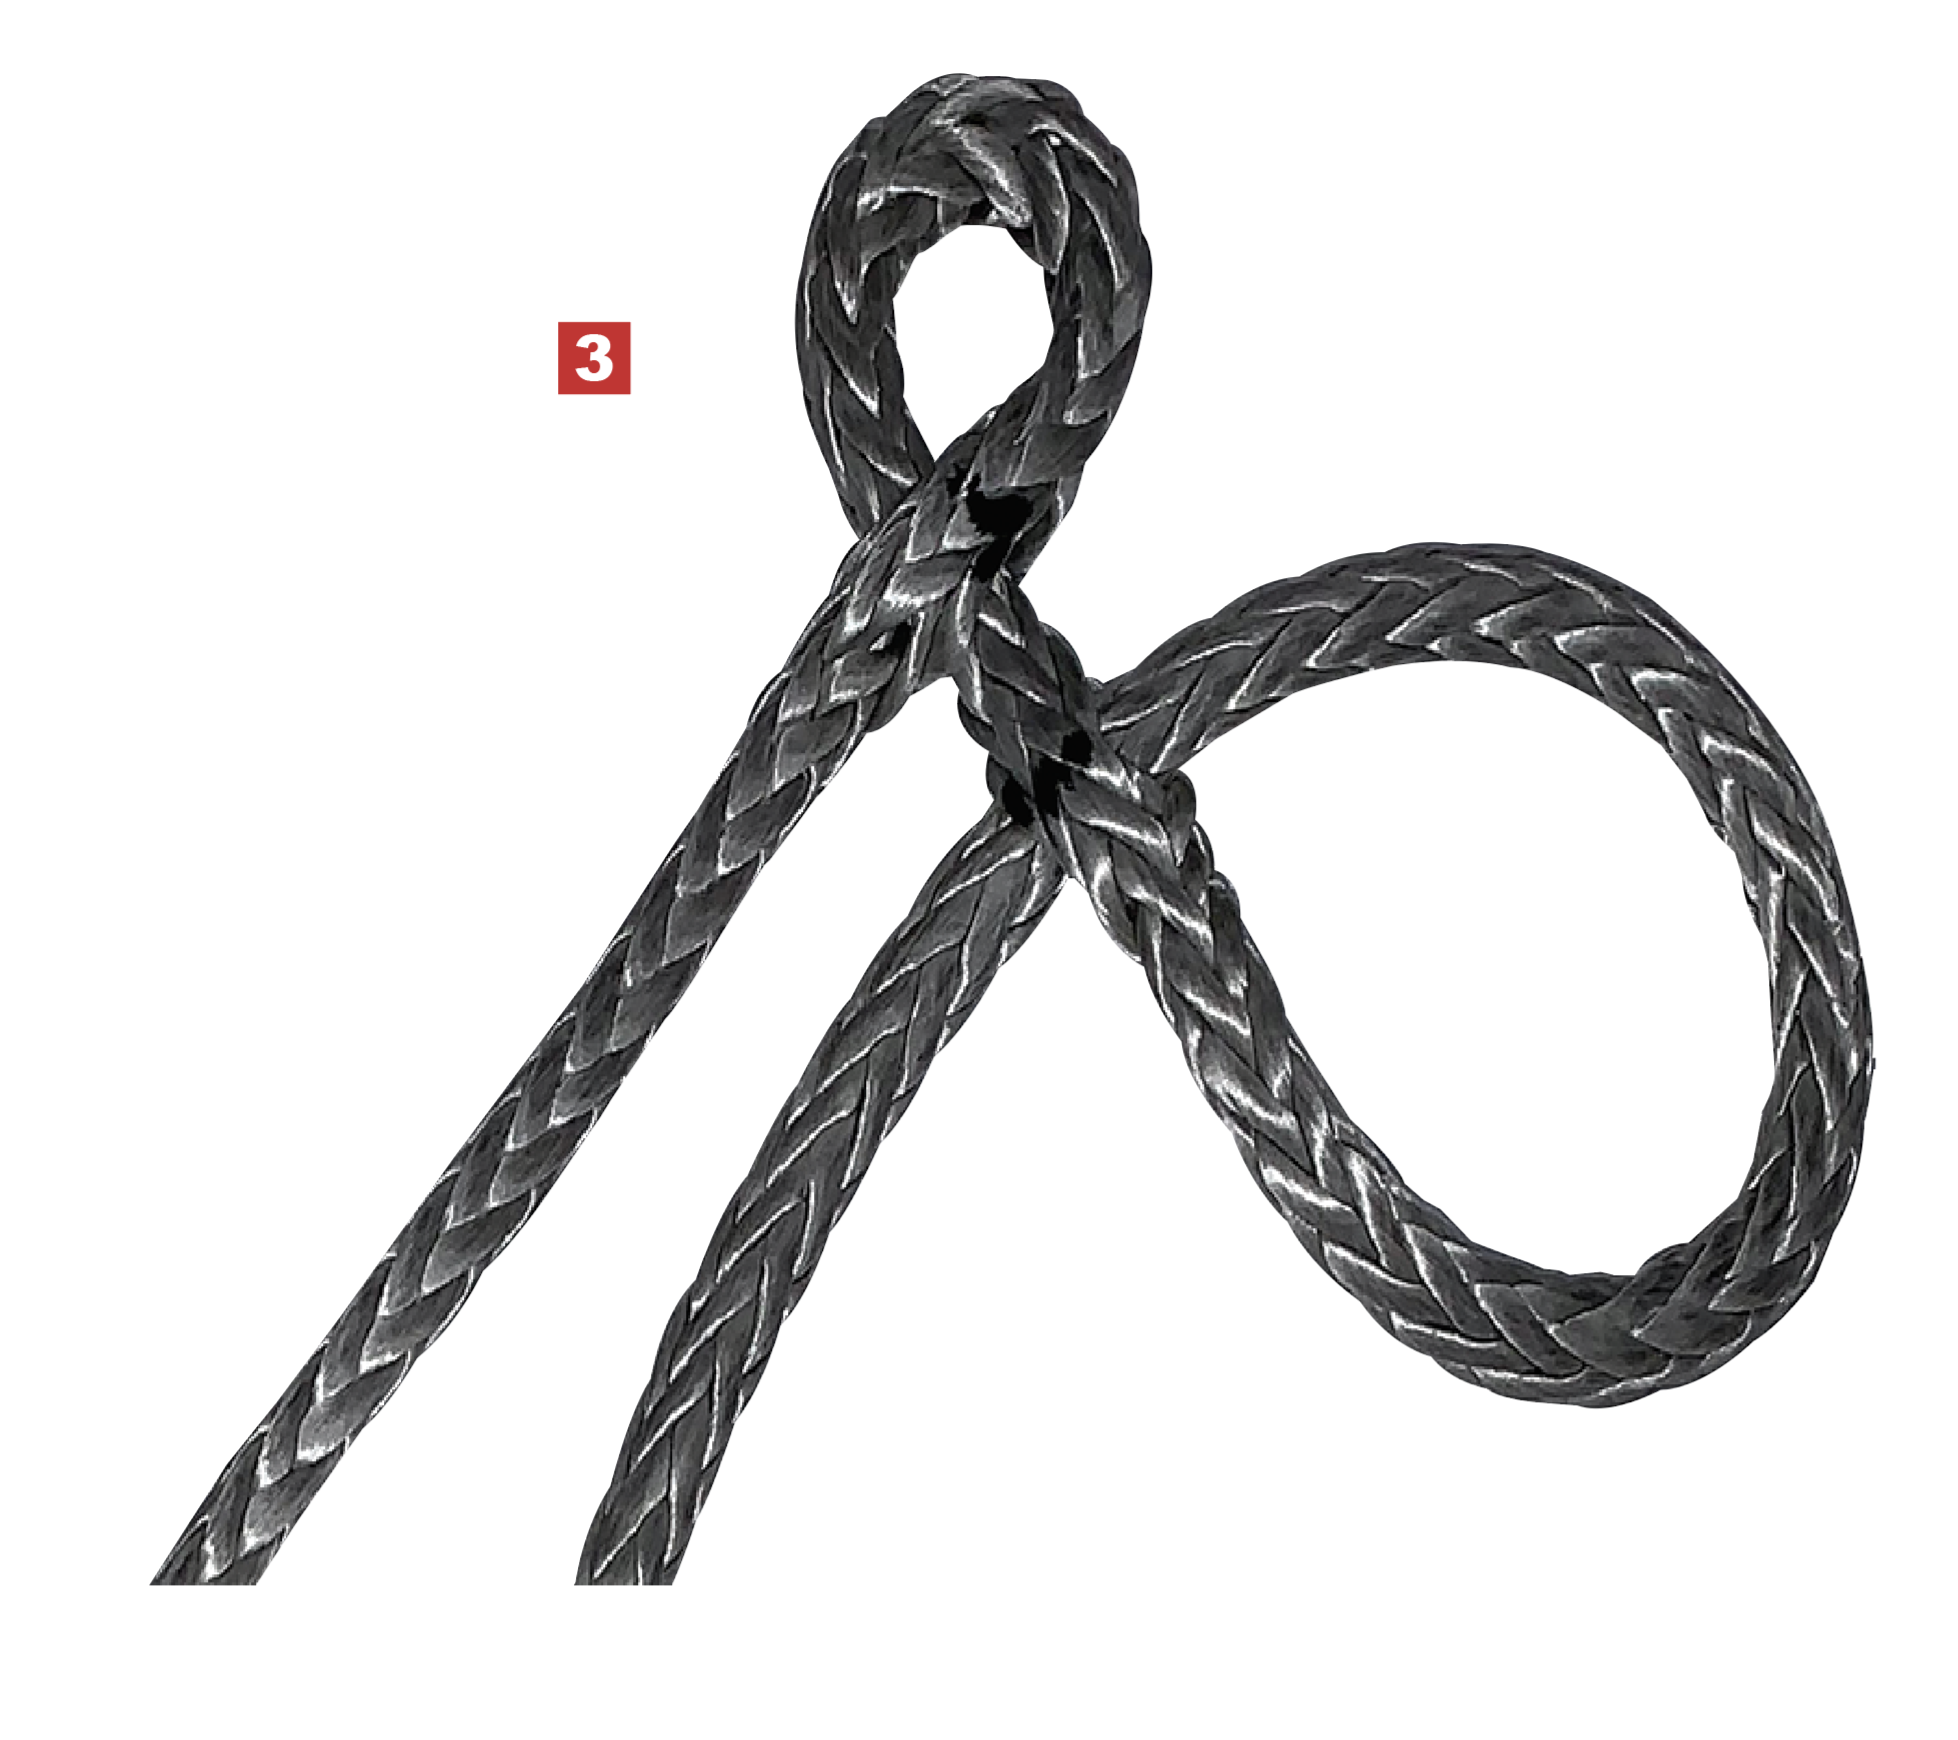
3. Setup the Brummel. The next step is to form the Brummel lock, but in this case we will only use one rope end since the rope may be very long or the other end already attached to something. A trick to make this easier is to push the awl through at the f
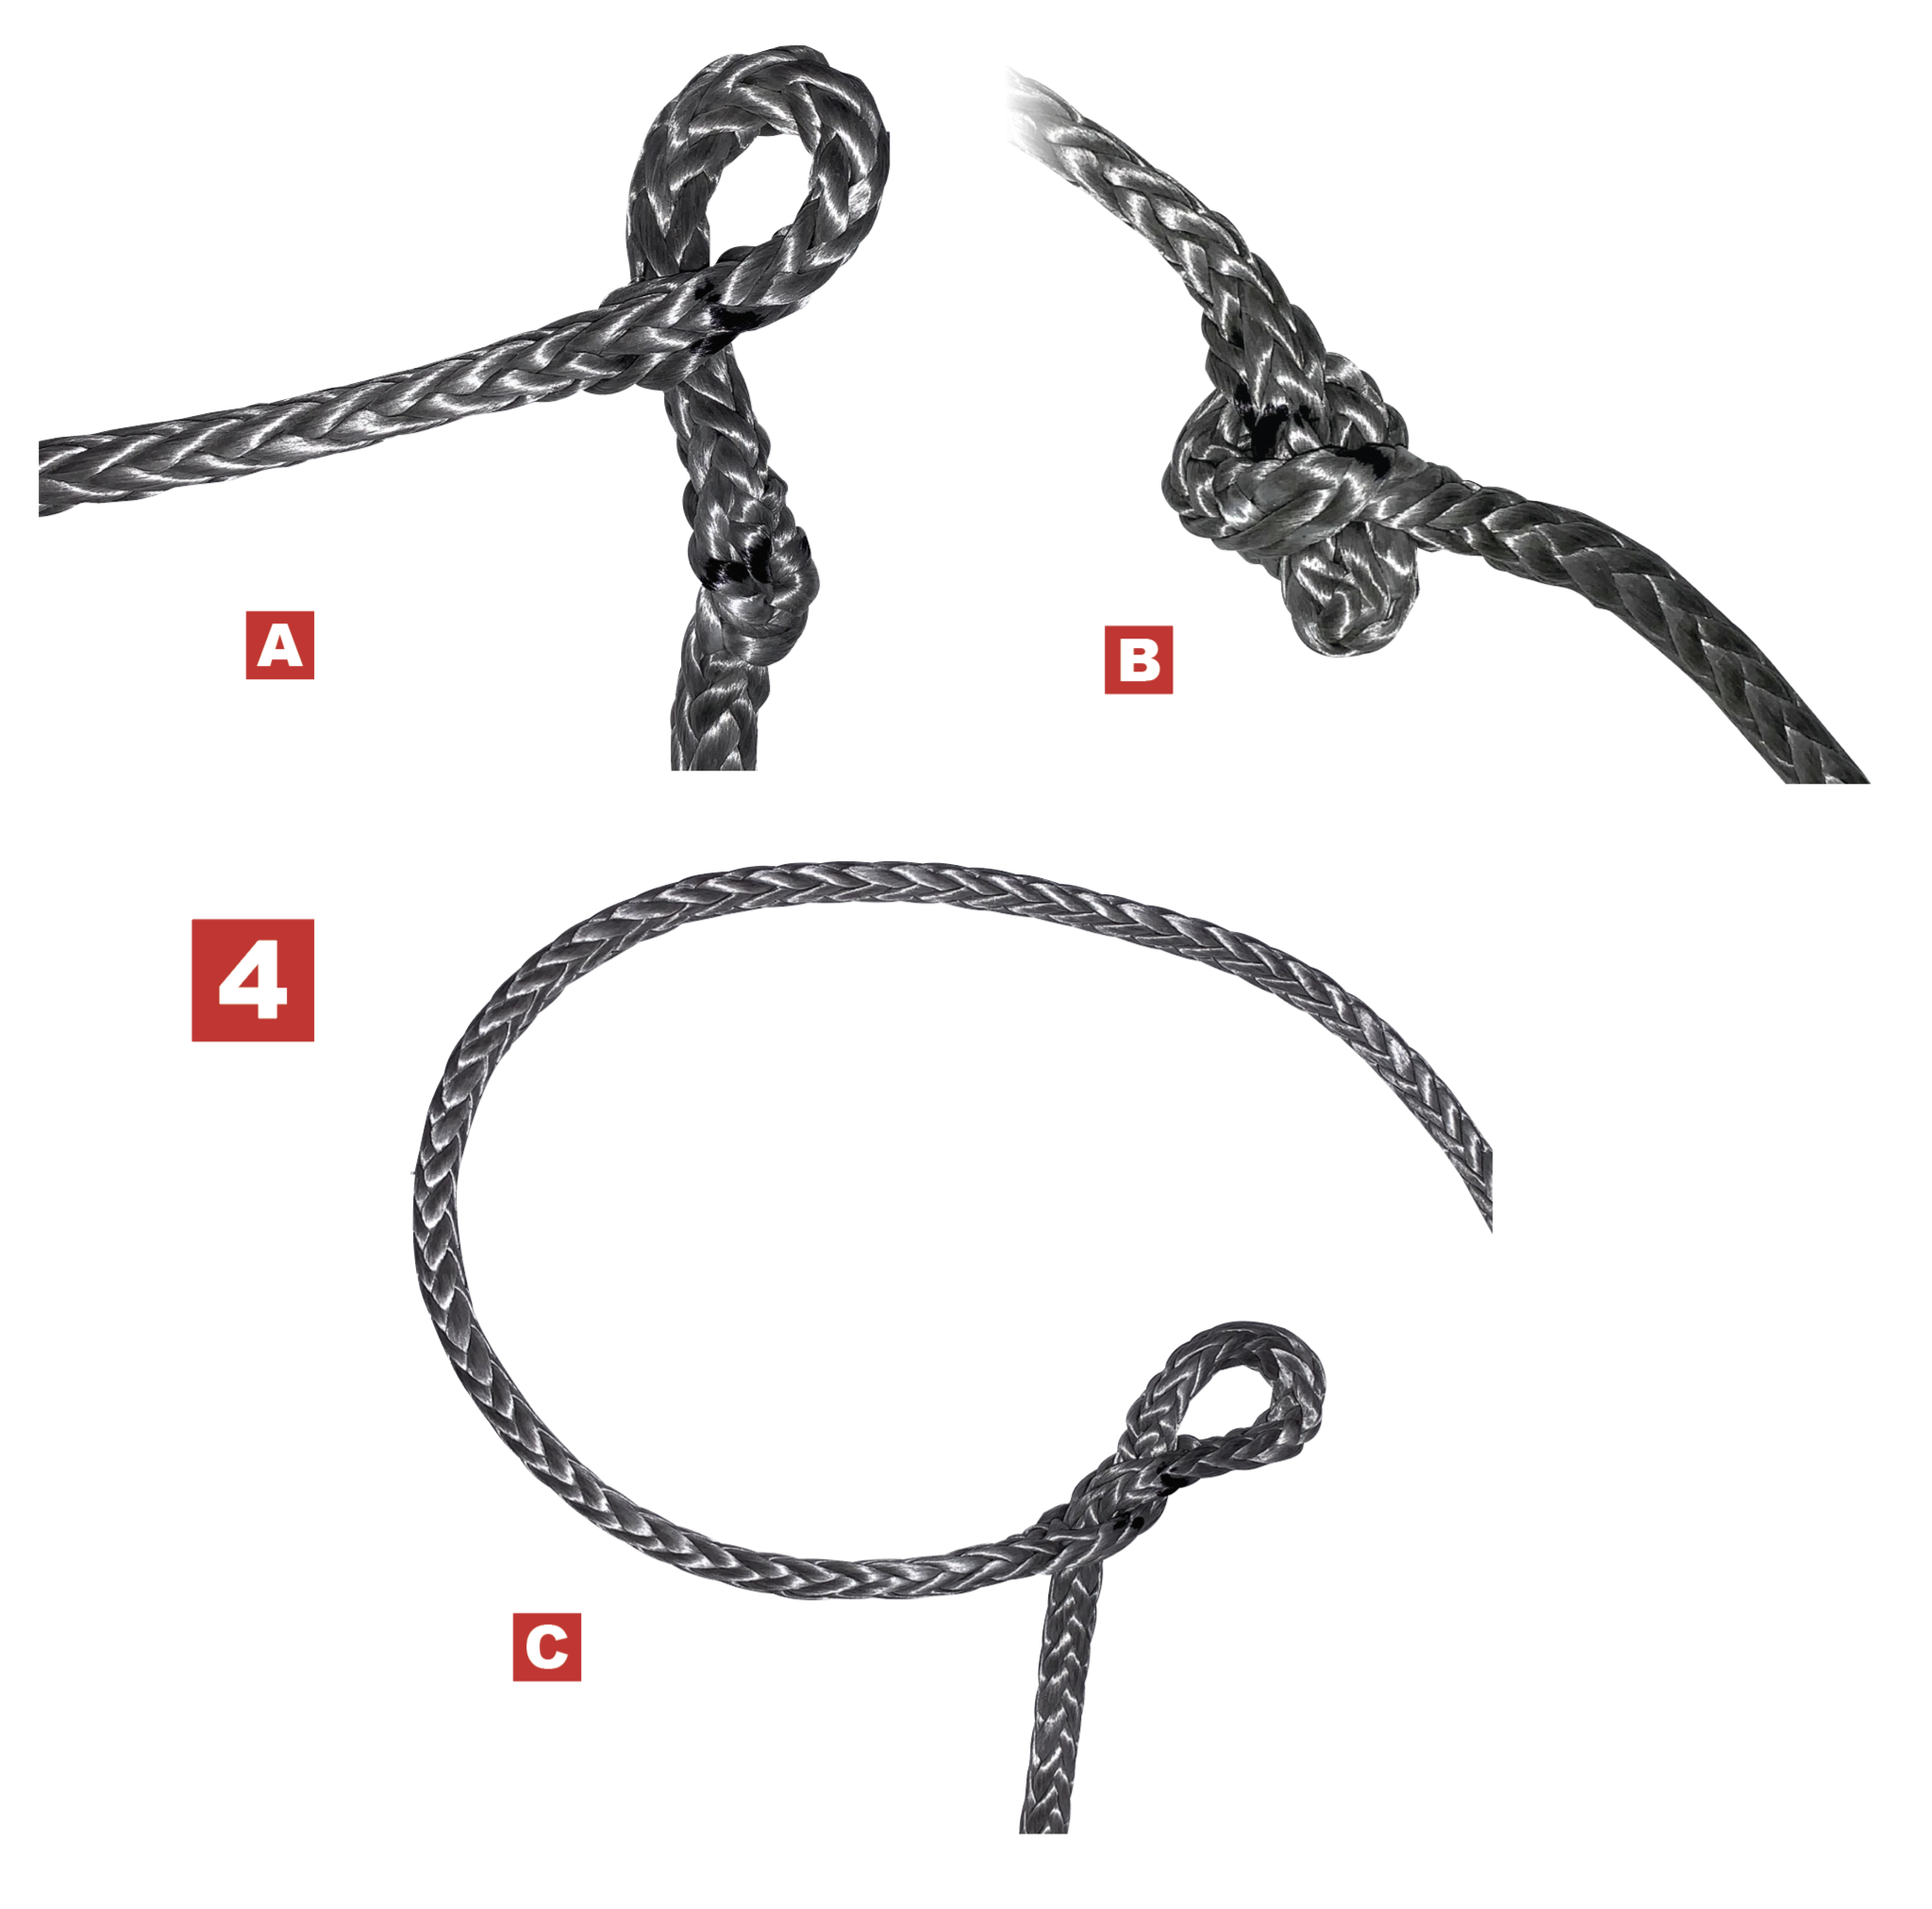
4. Form the Brummel. To form the Brummel, pull the tail through, capsizing the rope onto itself. This will result in a small hole and a distortion in the rope. Figure 4A shows the capsized hole. Enlarge the hole with the awl and pass the eye through it. T
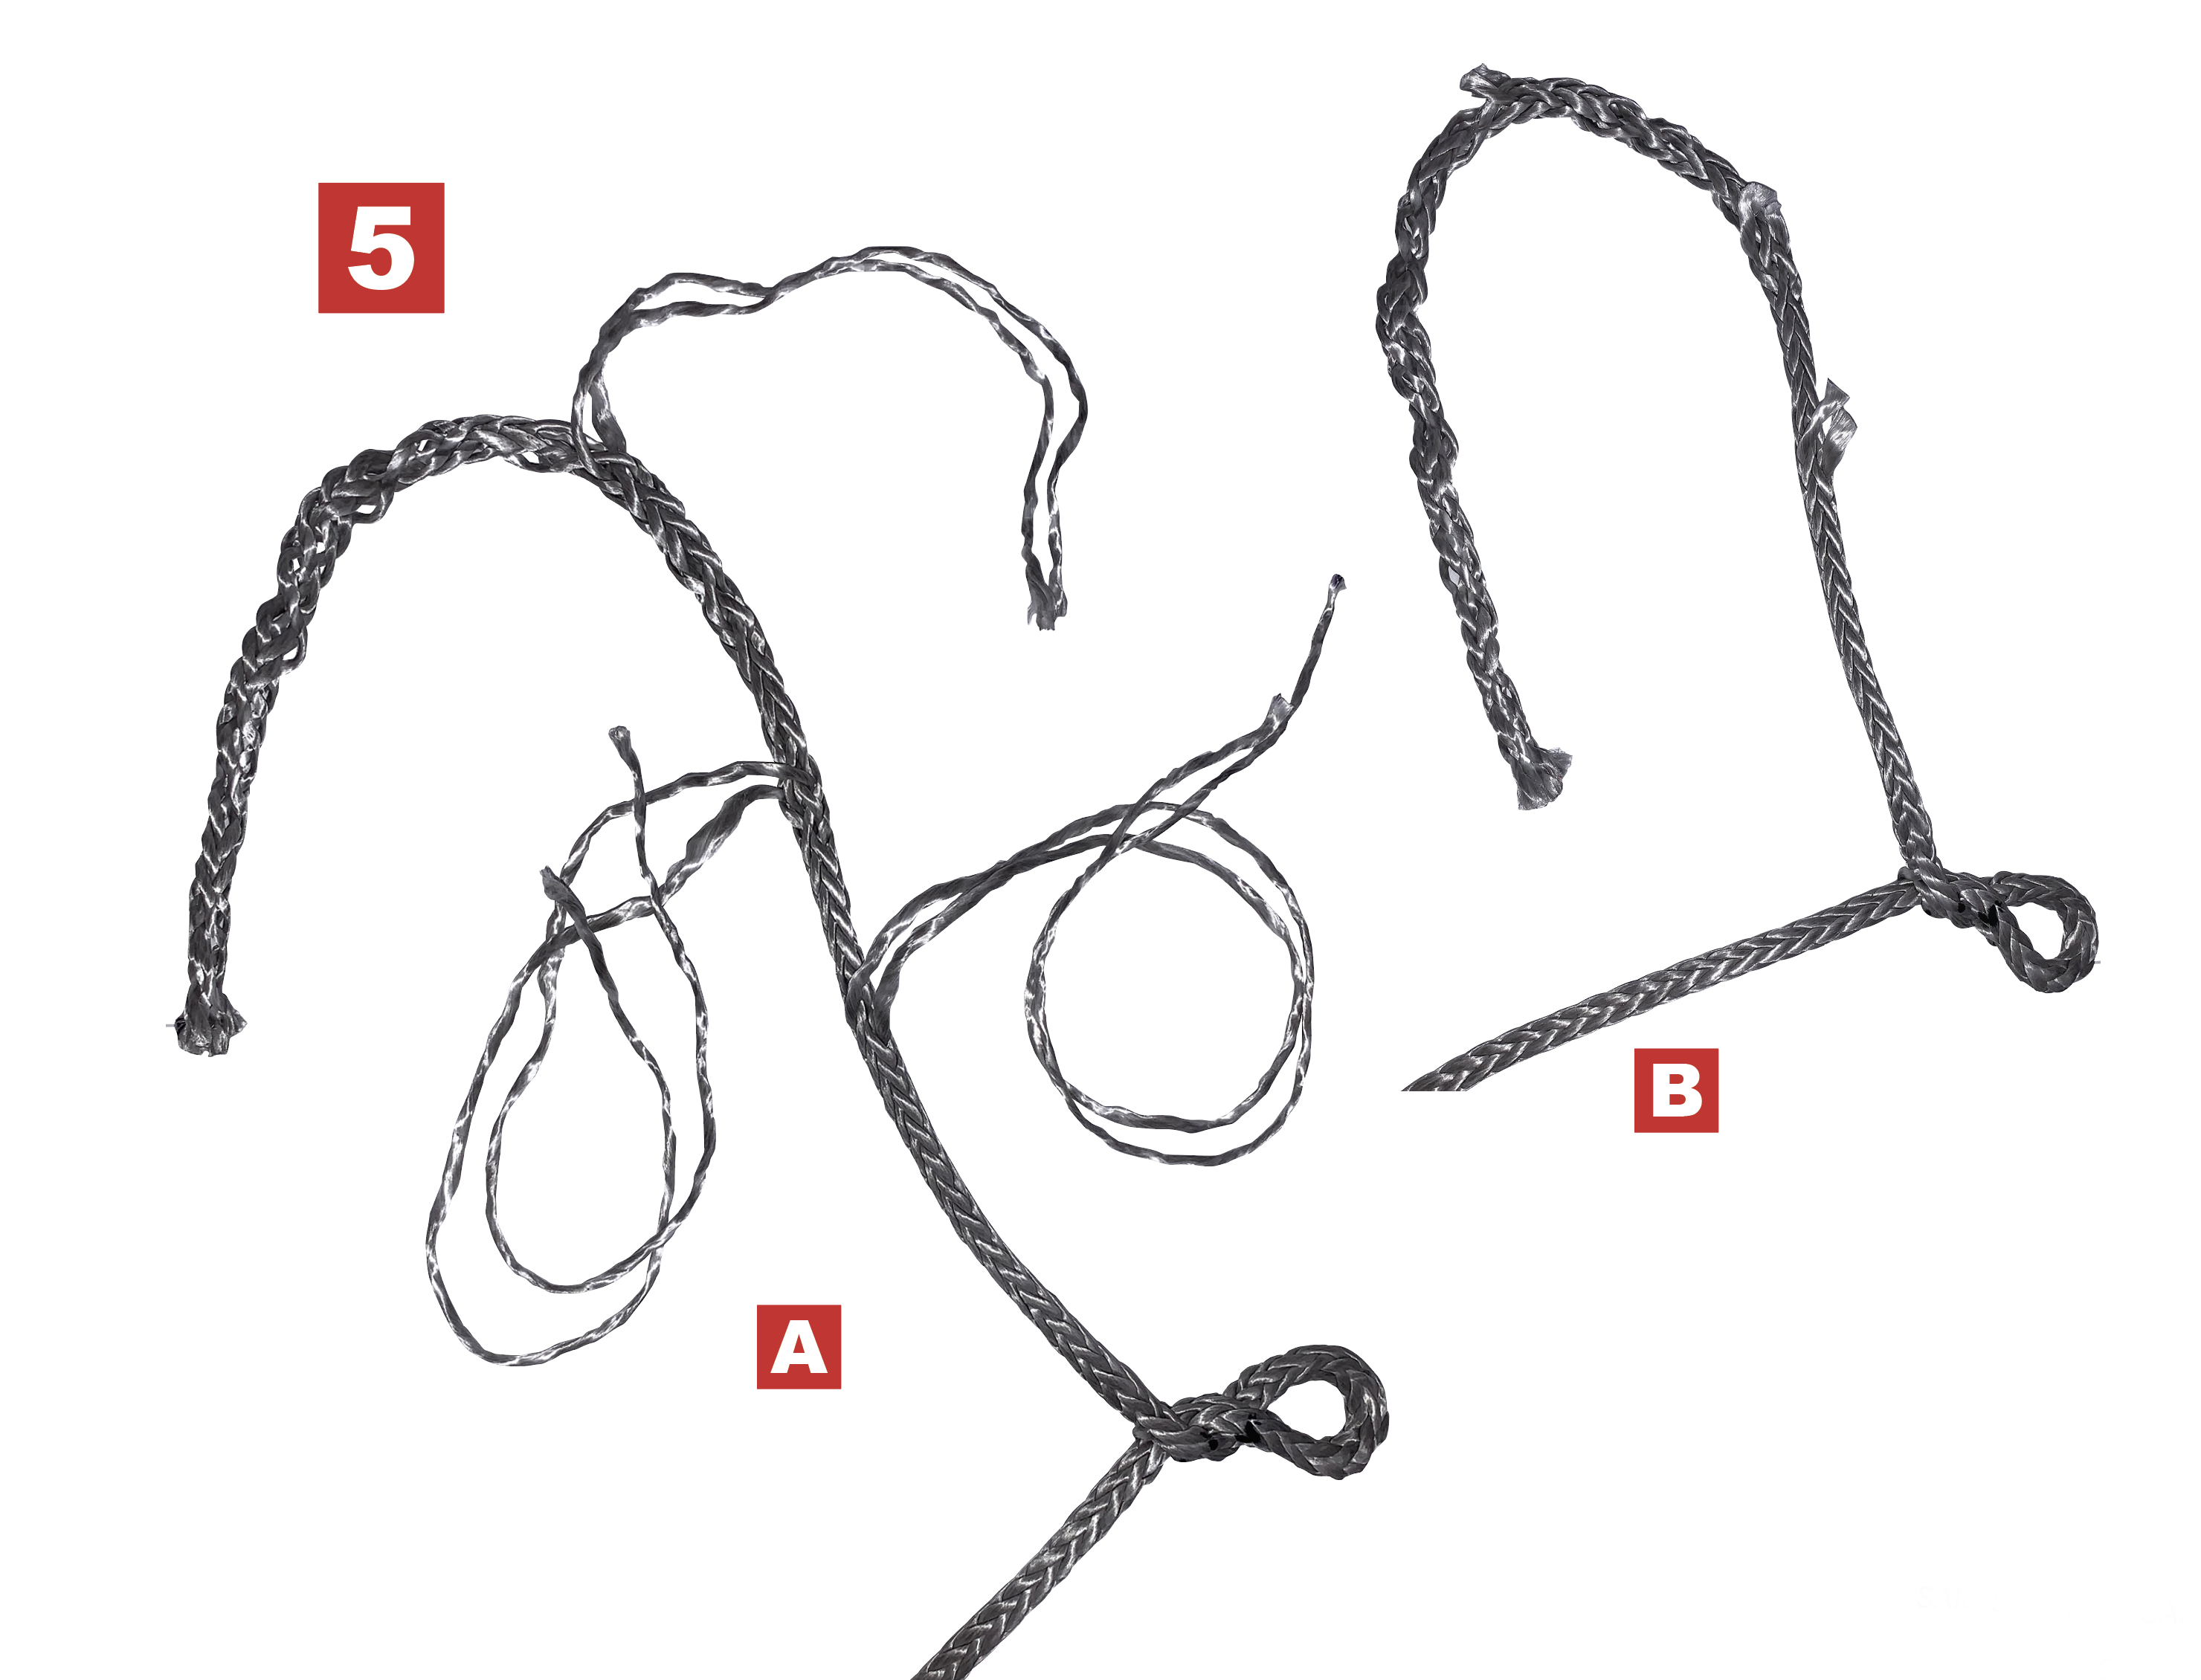
5. Taper the tail. Next, taper the tail. This taper will make the tail easier to bury and will ensure that the splice tapers nicely into the rope. A harsh lump at the end of the splice will cause a weakness in the finished splice. Starting about three-qua
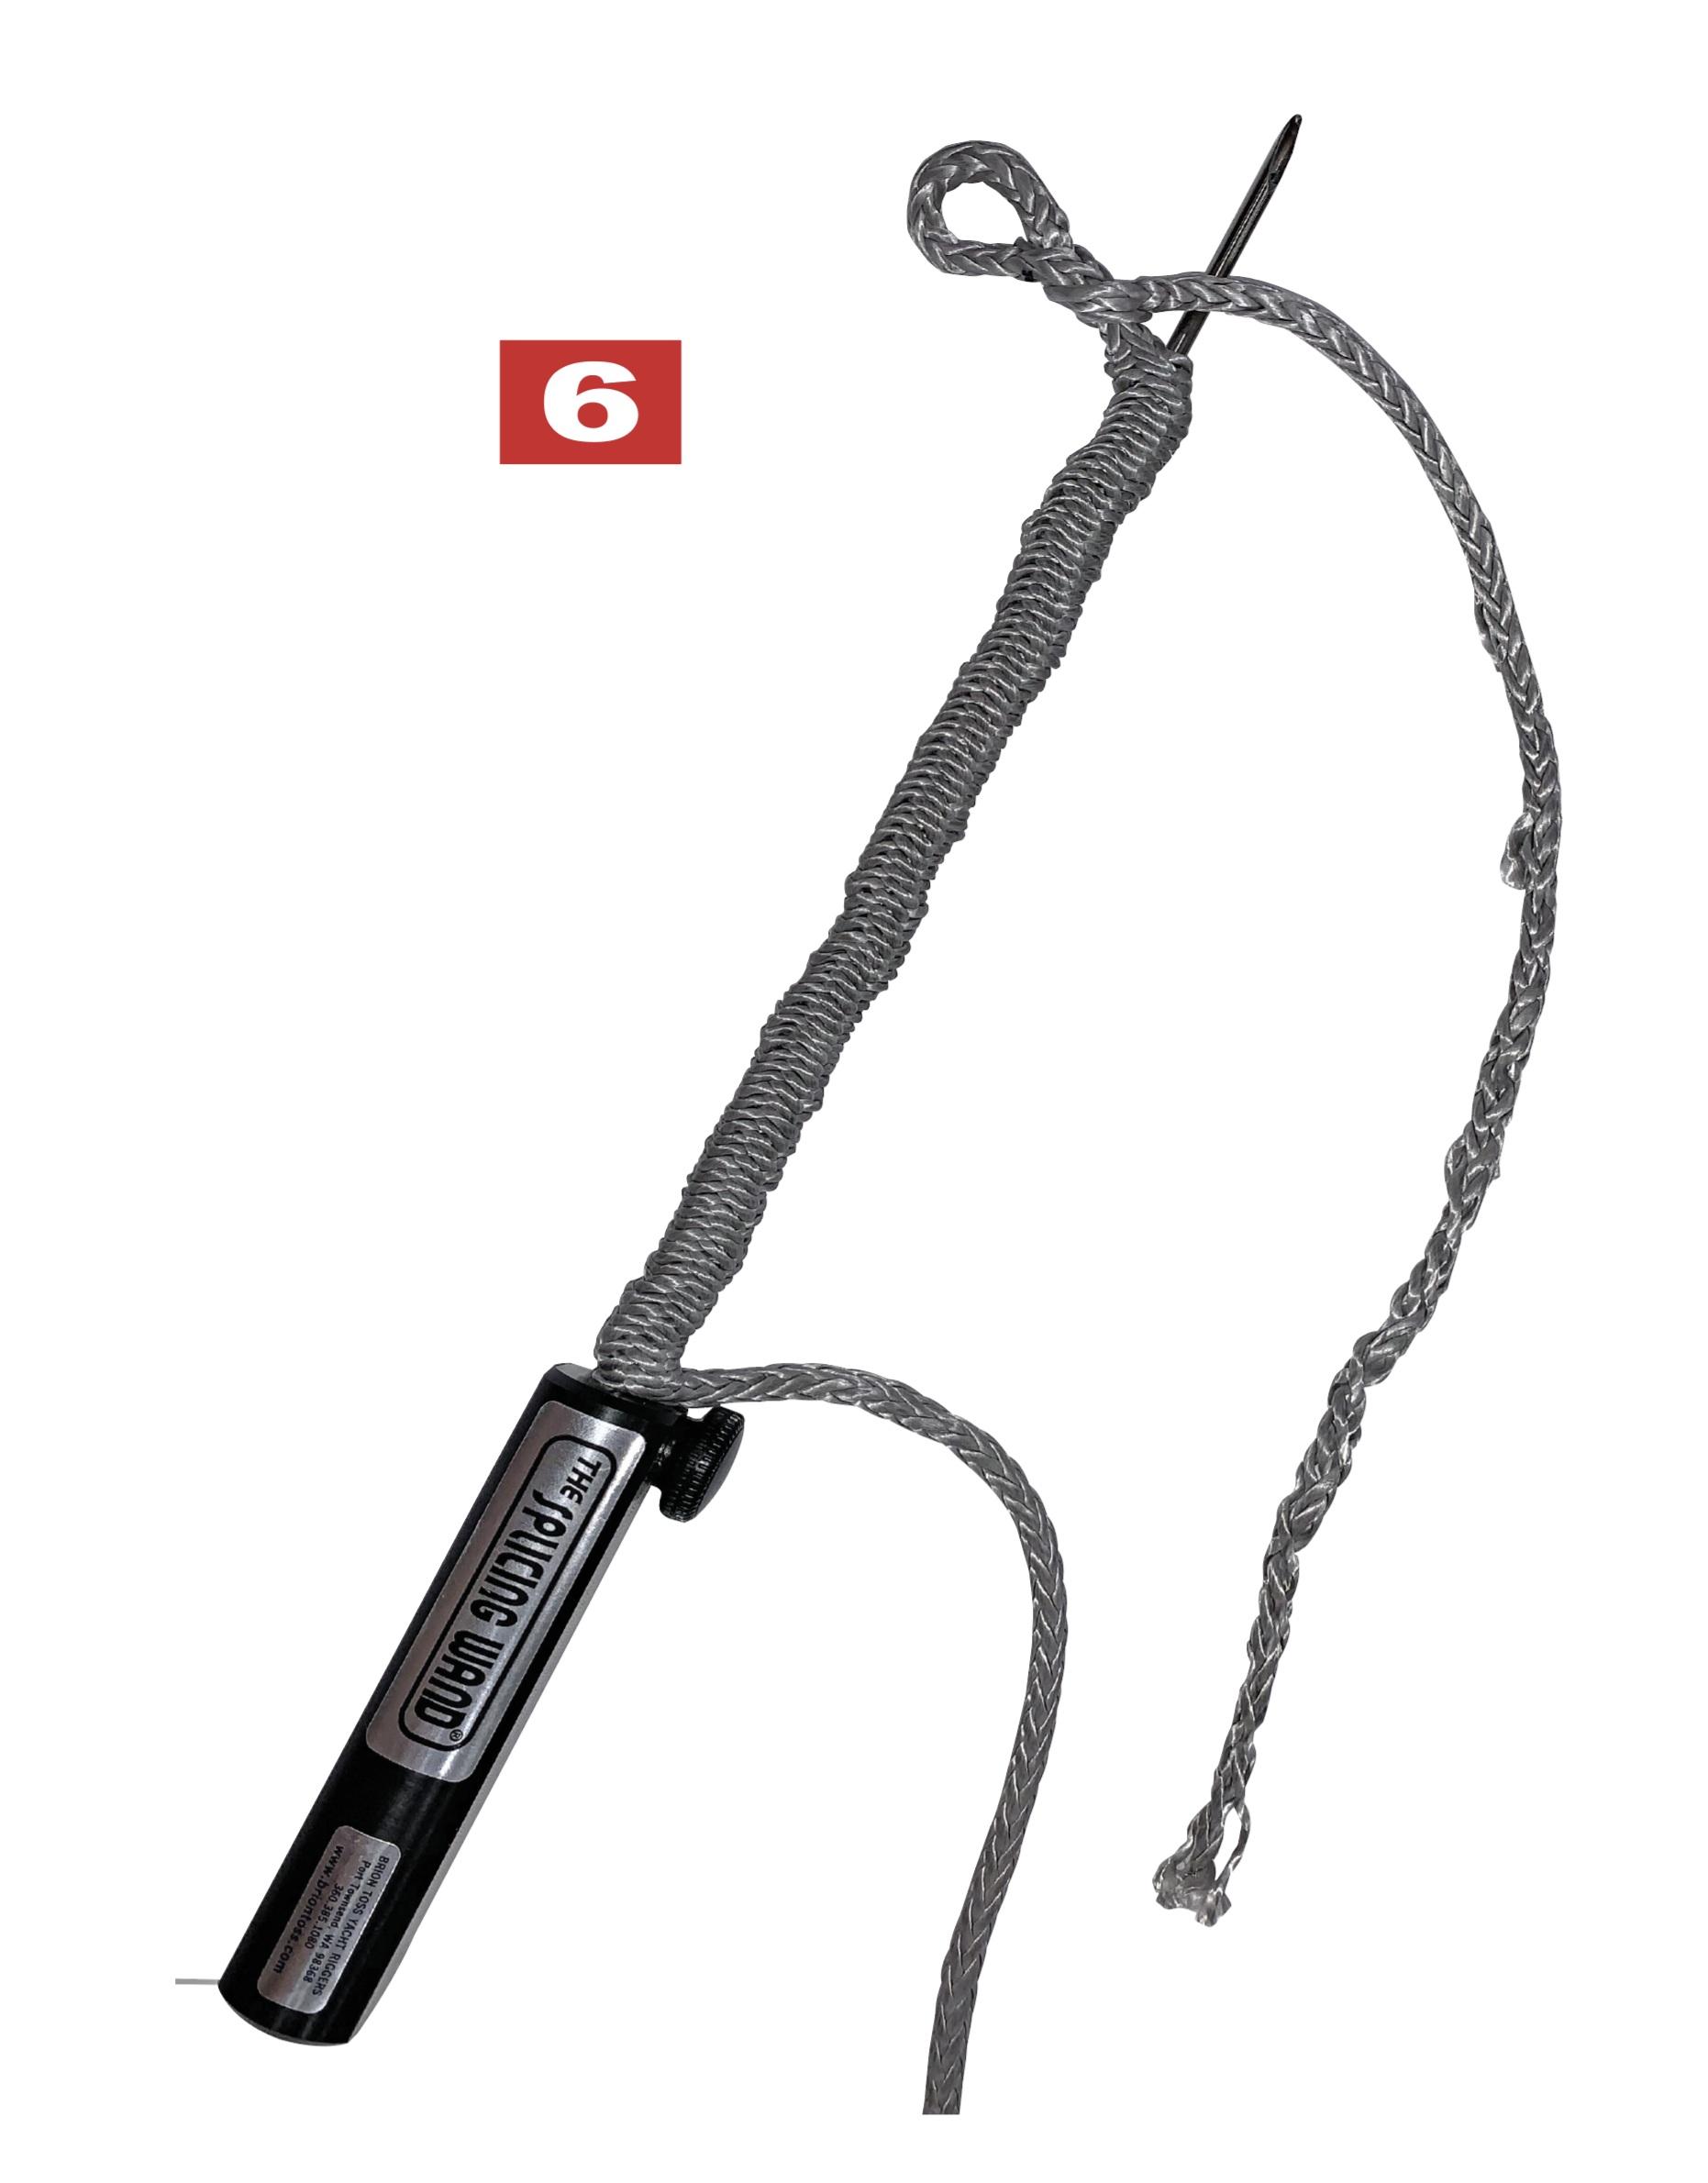
6. Enter the splicing. wand To bury the tail with the splicing wand, enter the wand about 1.5 tail lengths down the standing part of the rope, and exit just below the Brummel. When sliding the wand through the rope be careful not to snag any strands. Figu
Comments