
The knots you need to know
Mastering a handful of knots will give you a full arsenal of options on board
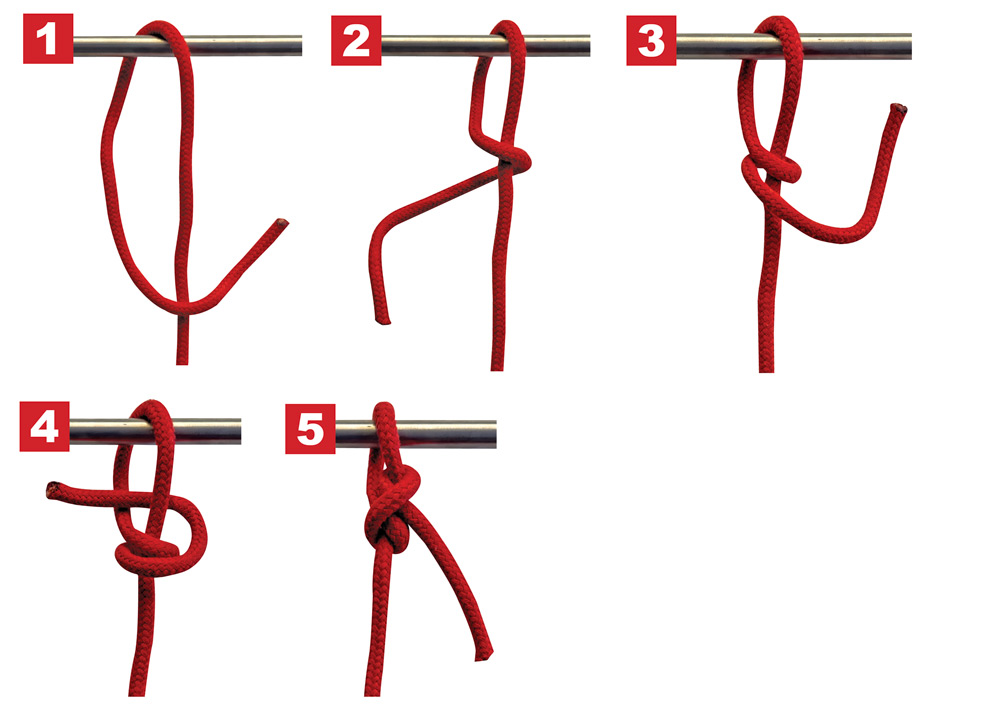
1. Start by putting the tail around the pole or boom, in the case of reefing lines. 2 to 3. Wrap the tail around the standing line. 4. Put the tail through the hole. 5. Bring the tail through the turn to tie a half hitch and cinch the knot.
The compactness of a knot is often desired. A bulky knot can jam on things, or well, just look bulky. Bulkiness is a benefit of a stopper knot. Stoppers are designed, via their bulk, to stop the bitter end of a rope from running freely through a block or fairlead. Stopper knots are a contentious topic, some people swear by them, others consider them danger. The anti-stopper crowd feels they are a risk, if they lose control of a rope, they want it to run free, not come up short on the stopper knot. For the record, I use stoppers on everything except for spinnaker sheets, if I lose control of a chute I want it to run free.
There are thousands of knots in the world, and more are being developed every day. If you are interested in diving deep, check out “Ashley’s Book of Knots” or the “International Guild of Knot Tyers.” Although I enjoy learning new knots, a few tried-and-true knots make up the bulk of what I use onboard.
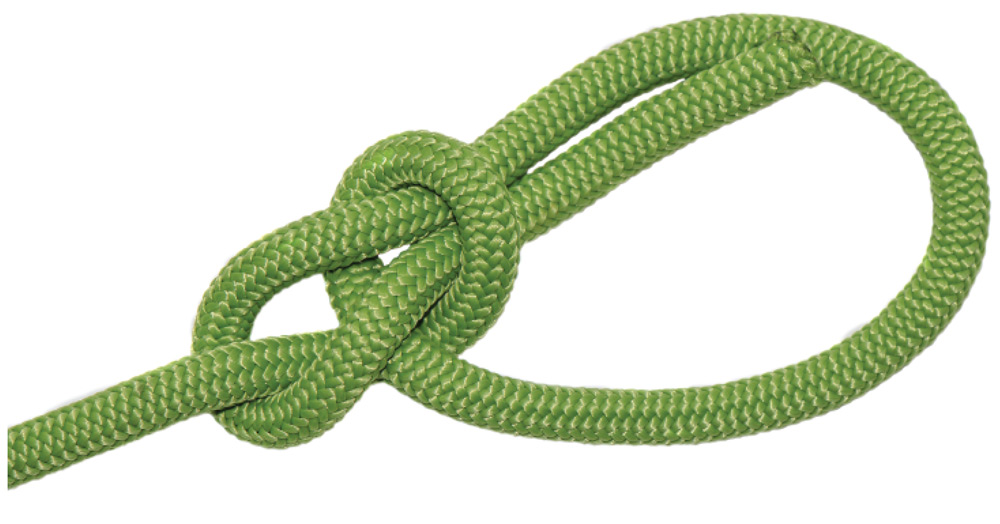
The “official” source for knots is generally accepted to be “Ashley’s Book of Knots,” which defines the specific topography that makes a knot. A proper bowline’s tail is on the inside of the loop, with the center of the knot showing two lines in a U-shape.
My go-to for stopper knots is the figure-eight knot. It’s easy to tie, bulky enough and easy to untie. Security isn’t a big factor for stoppers, but the double overhand knot offers a little more security, the figure-eight can flog out.
The half hitch is one of those Boy Scout knots that just keeps going. I seldom use a half hitch by itself, but it’s the basis of many knots. When tying a rope to a ring, for dockline for instance, I’ll take two turns on the ring to start. These turns distribute the load across more of the rope to reduce chafe, and add friction to help control the load. I’ll follow with two half hitches to lock things down. This construction is commonly called a round turn and two half hitches.
A slight derivation of the half hitch is the buntline hitch. At first glance, it looks like two half hitches tied on the standing part of the rope. On closer inspection, the half hitches are a clove hitch on the standing part, with the bitter end tail trapped “inside” the knot. The knot is very compact and draws up tight. That trapped bitter end makes the knot very secure; a flogging load on the line draws the knot up tighter. A downside is that the knot can draw up very tightly and be difficult to untie. I use this knot for securing reefing lines to the boom. I take four turns around the boom and then form the buntline hitch. The knot is compact and secure, and the turns take much of the load, so it doesn’t draw up too tight.
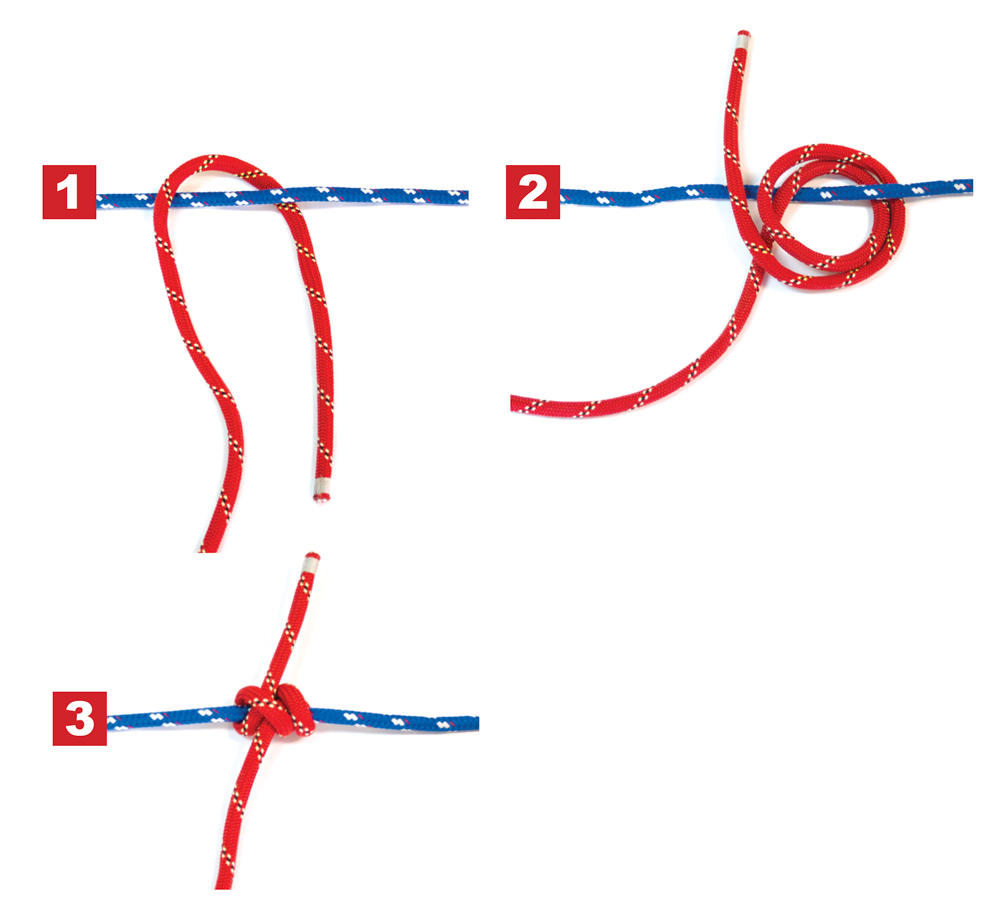
A rolling hitch is a good knot to have in the sailor’s arsenal because it can help get you out of bind. One common use for it is fixing an override on a winch. By tying a rolling hitch on the seized line before the winch, and taking up the load on another winch, you can release the pressure on the override and clear it. Rolling hitches slide in the direction of the last single wrap and lock when pulled in the direction of the original two wraps.
How to tie a rolling hitch: 1. Wrap the line twice around the pole, sheet or lines that you are tying onto. 2. Then wrap one turn to the opposite side of the original wraps. 3. Lead the end under the last turn and tighten. The knot locks when the working end of the line is pulled toward the double wraps.
Comments