The knots you need to know
Mastering a handful of knots will give you a full arsenal of options on board

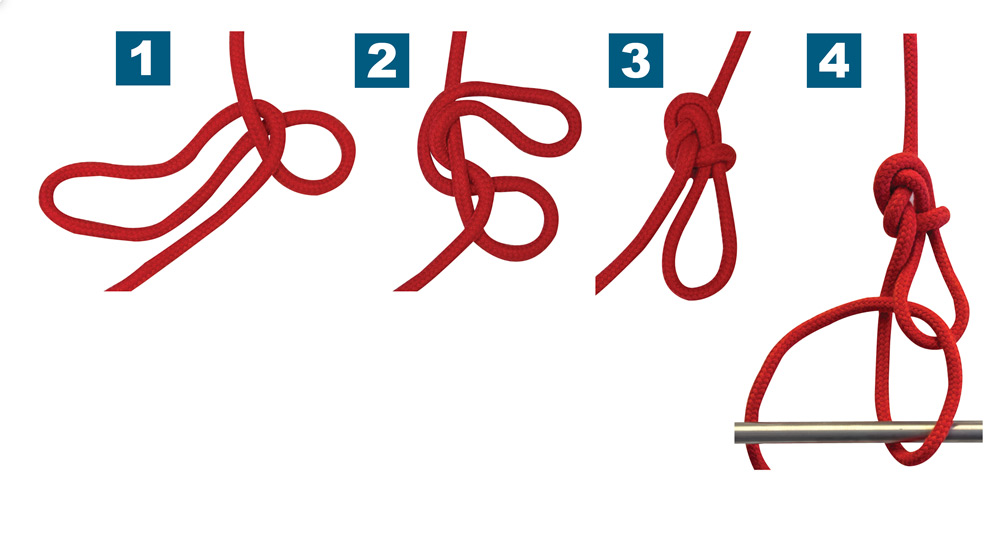
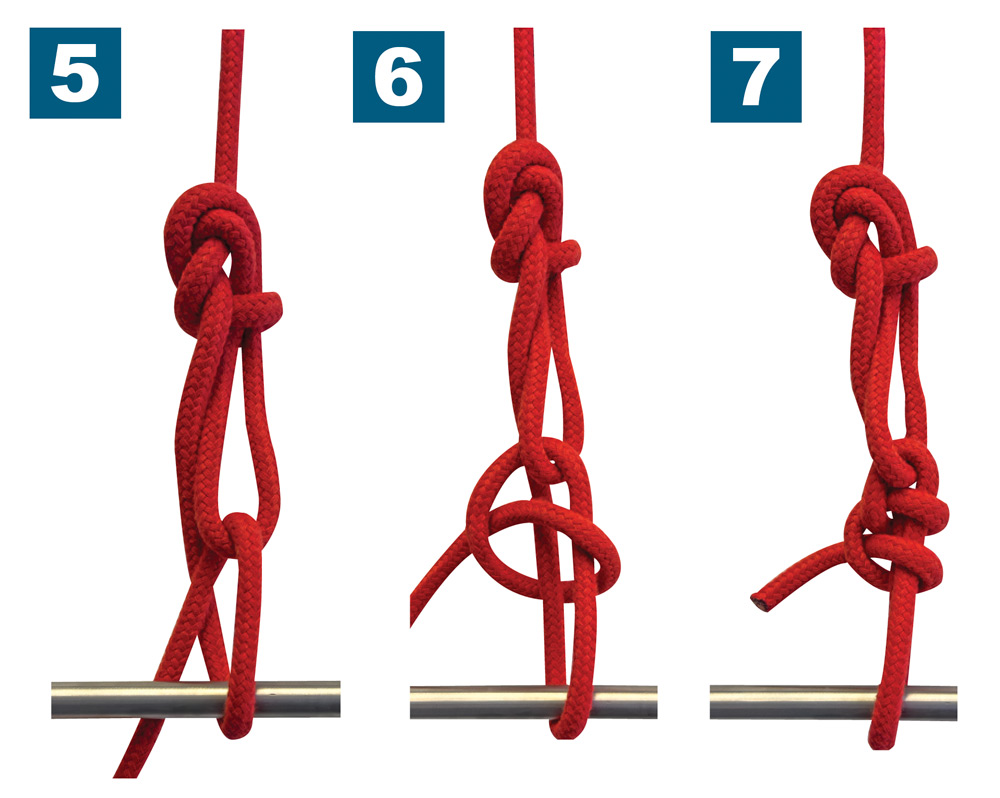
How to tie a trucker's hitch: 1 to 3. Form a bight in the standing line by tying a figure-8 knot. 4. Loop the tail end through the securing point and back through the bight. 5. Pull the tail tight. 6. Bring the tail around the back and through to form a half hitch. 7. Secure the knot with another half hitch.
The cleat hitch is very often tortured, this application is the most typical place for “if you can’t tie a knot, tie a lot.” Walk down any marina dock and you’re likely to find cleats overflowing with figure-eights, hitches and many feet of dockline, all of which is incorrect and unnecessary.
A proper cleat hitch starts with a turn around the base under the far horn of the cleat, which employs the friction of the turn. From there, cross over to avoid stacking up turns on the base, which can make the hitch difficult to release if the load is continually pulling and releasing. Then follow up with another cross over and finish with a hitch to lock the knot, rather than adding more crossovers. The exception is when there is a small line on a large cleat, when a couple extra crossovers are called for before the hitch.
The last knot is a series of knots applied to solve a problem, the trucker’s hitch. The trucker’s hitch is unique in that it can apply tension with a 2-to-1 advantage. A classic application for the trucker’s hitch is lashing down a dinghy. You pop your dinghy up on deck for an offshore passage and you want to make sure it doesn’t get away. Lashings are typically done toerail to toerail across the bow. You can start with a bowline on one side, lead the line over to the other side, and you need to apply tension. The trucker’s hitch will allow you to apply a 2-to-1 purchase to keep the dinghy in place on deck.
The knot world is broader than the bowline, but you don’t need to know an abundance of knots to get the job done onboard.


Comments