
Delamination repair
Wet core is a recipe for problems, but repairing the problem is often not as hard as you may think
Wet core is one of the most common problems you’ll find in boats constructed with a cored-laminate hull or deck, particularly those of a certain age. Although tackling such damage can be a messy job, repair jobs are not as difficult as you might think.
Decks and cabinhouses are often made of cored laminates, typically using balsa, plywood or foam, and all of these are susceptible to water intrusion. It’s a misconception that foam cores are impervious to water intrusion, and even these cores can sustain damage. When moisture enters the core, it starts to degrade, compromising the integrity of the deck or hull.
Balsa is the most common core material because it’s inexpensive, light weight and has very good compressive strength. The downfall of balsa is it absorbs water very quickly and degrades faster than plywood. Plywood is typically used in areas where strength is needed such as around chainplates, mast partners and winch bases. Decks with foam core may have multiple densities of foam to achieve the strength needed in areas of high load or where weight savings are needed.
There are a couple ways damage to the core occurs from moisture intrusion. The primary damage is from rot. You can mitigate the damage by carefully sealing every fitting in the area of wet core, which prevents additional moisture from entering, but also seals the core from oxygen, slowing the decomposition process.
This is an important measure to take as soon as you notice an area of soft core. When core material rots it loses its bond to the FRP skins, also known as delamination.
Laminate with moisture intrusion can also be damaged from the freeze-thaw cycles. When damp laminate is exposed to repeated freezing and thawing and therefore expansion and contraction, delamination occurs.
Regardless of why an area delaminates, when it gets bad enough, it will need to be repaired.
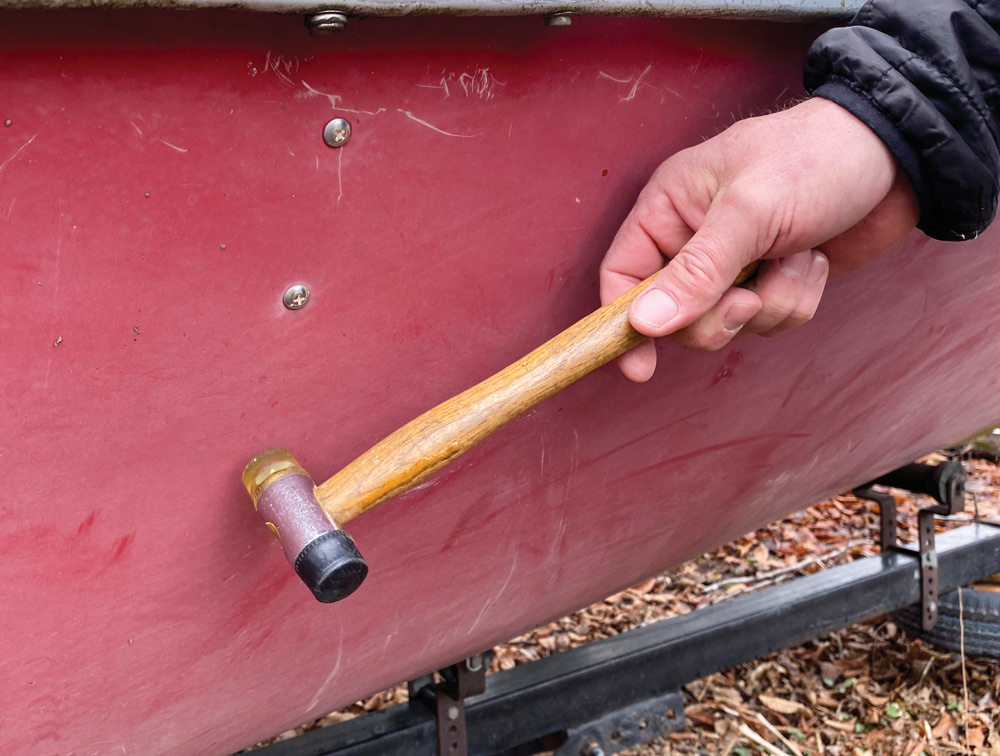
Severe delamination can sometimes be easy to spot; you’ll literally be able to feel the soft area. But you can check for and identify delaminated areas with a plastic hammer. Tap on suspect areas, listening for a change in tone. Areas in good shape will have a “solid” tone. Delaminated areas will sound dull. If you come across a dull-sounding area tap around it, working out until you get to a solid sound. Mark off the suspect area with chalk or tape.
If you suspect delamination under a fitting such as a stanchion, try putting some load on it and watch to see if the deck moves. If it does, there is likely delamination.
Moisture meters can also be used to check for delamination, but use caution in interpreting the reading. Moisture meters work by reading how conductive a surface is, but there are many materials that are conductive, including additives in paint and gelcoat. The best way to use a moisture meter is to take comparable readings from similar locations to see of the laminate is more conductive in one location compared to a similar location.
Once you’ve identified an area of delamination that needs repair, it’s time to get started on what will be a messy project.
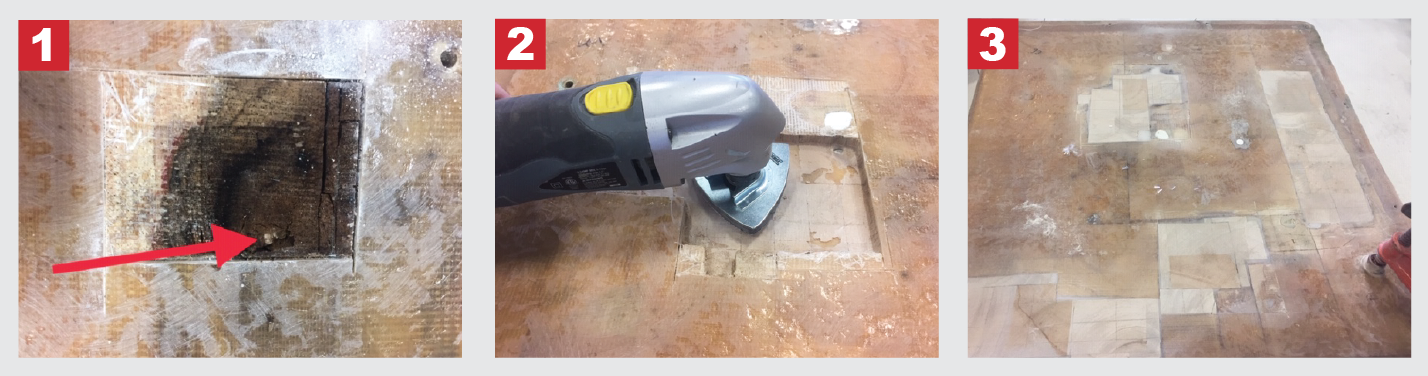
1. Start by removing all fittings in the area to be repaired and determine how you want to attack the project. Consideration should be given to ease of working conditions and the final finish of the repaired area. For example, if the area to be repaired is on the deck, you may want to consider performing the repair from the interior to minimize any gelcoat or paint work on the deck needed to match the existing finish. However, if it is physically impossible to reach the damaged area from the interior, you’ll save time by doing the repair from the outside even if it includes fairing and paint or gelcoat work.
2. Determine the area of the damage to be repaired and mask off and protect as much of the surrounding area as possible. You will need to do a fair amount of grinding and sanding and fiberglass dust gets everywhere.
3. Using a small oscillating saw, cut the fiber-reinforced plastic skin and remove it. If you are lucky and manage to remove it in one piece you may be able to reuse the skin, but typically it is damaged or needs to be cut out in smaller pieces, which renders it useless. When cutting the outer skin, take care not to cut too far into the laminate and definitely do not cut completely through. Start small and when you remove the outer skin you can then get a good assessment of the condition of the core. From this point, you can start to remove the core and addition outer skin until you get to a point where the core material is dry and the laminate is sound.
4. Once you have opened up the laminate and cut out all the damaged areas it is time to start prepping the areas for the new core and skin laminate. The core area will need to be sanded to remove any imperfections, contamination or ridges. Grind a scarf joint around the repair area to a width of 12 times the thickness of the skin, about 1.5 inches for 1/8th-inch skin. Go slowly when grinding and sanding to minimize heat buildup on the existing laminate. Heat can damage the resign and could lead to bonding problems later.
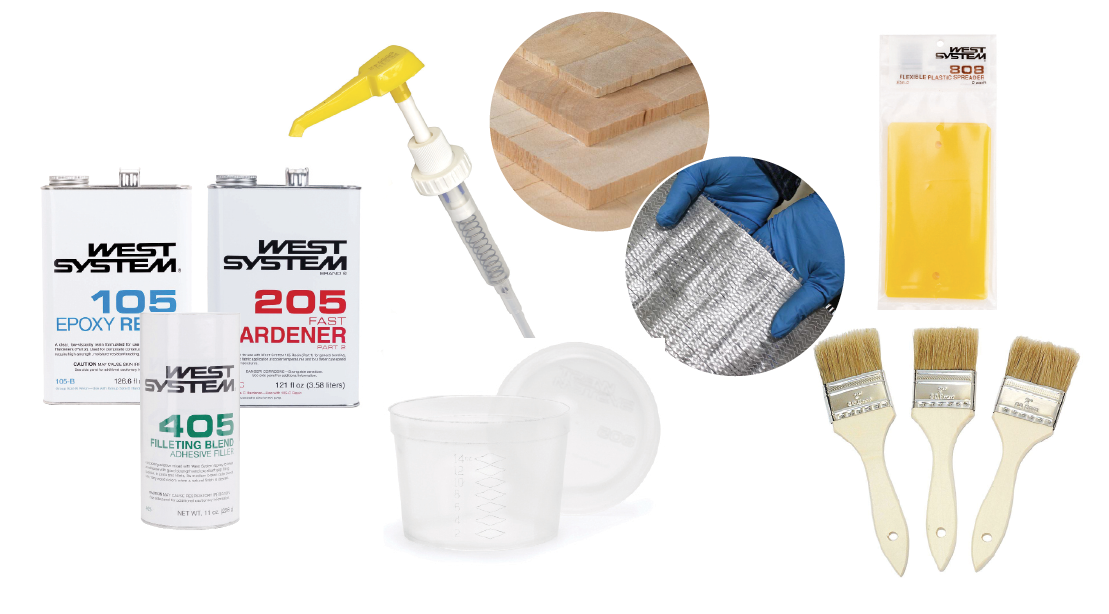
5. Once the grinding and sanding is completed it’s time to start assembling the repair. Cut and dry fit the new core material as precisely as possible. A good-fitting core insert will minimize the amount of resin needed. With the new core in place, take a sheet of clear plastic (something like a disposable dropcloth works fine) and lay it over the area. Trace the outline of the area on the plastic and include alignment reference marks. This will be used to cut the fiberglass, carbon fiber or Kevlar to the correct shape.
6. Carefully clean the area of all dust and debris. Mix up enough two-part epoxy or polyester resin to wet out the area where the core will be replaced, including the bottom and the sides. A cheap, disposable paint brush will work fine for this job. If the new core is not a perfect fit, you can add some thickening additive to the resin but keep the consistency as thin as possible to allow it to flow into any voids. Press the core firmly into place and allow it to set up before putting the outer skin laminate on place. You can allow it to fully cure but for the best adhesion it is better to add the final laminate while the resin is not fully cured and somewhat soft.
7. Using the plastic that you traced the outline of the repair area, cut and place layers of fiberglass, carbon fiber or Kevlar to the desired thickness needed to match the original skin thickness. The first layer should be slightly bigger than the traced outline and each succeeding layer slightly smaller and smaller. The goal is to match the taper of the patch to the scarf that you ground out. At this point, wet out the fiberglass and layer each piece as you go until all layers are fully saturated with resin. Place another piece of plastic over the top and use a squeegee to firmly squeeze out the excess resin.
8. With a scissors, cut the now wet fiberglass on the traced line making sure you note any reference points. Peel off the plastic on the side where the largest layer is as that will be placed over the core and scarf area first. Once the piece in place, use your squeegee to smooth out the fiberglass.
9. At this point, you can add additional steps such as a vacuum bag to fully clamp the repair in place. Vacuum bagging compresses the repair as the resin cures, however it requires additional equipment that many DIYers may not have access to. If you have access to peel ply, a thin nylon fabric, you can remove the plastic film and then apply the peel ply and smooth it out.
10. Once the repair is fully cured per the resin manufacturer’s instructions, remove the peel ply or plastic and fair and paint or gelcoat as desired. Remount the hardware, making sure to bed it properly using a marine-type sealant/adhesive such as 3M 4000 or Sikaflex and go sailing.
Comments